4 Quick Start
Step1: Create a new project:
Open Unity and create a new project as shown:

Fig 4.1 Create a new project
Step2:Import SDK
Enter Windows>Package Manager>+>Add package from disk…
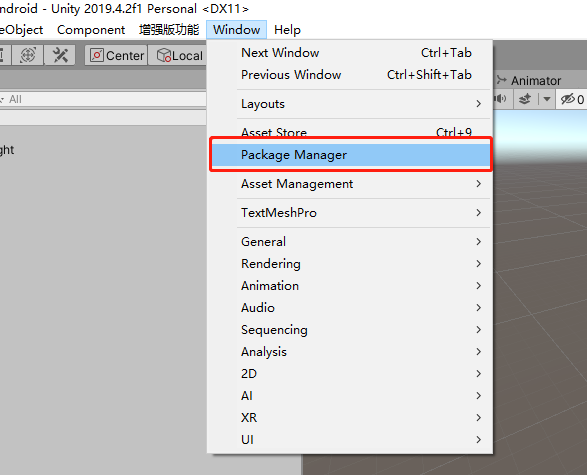
Fig 4.2 Open Package Manager
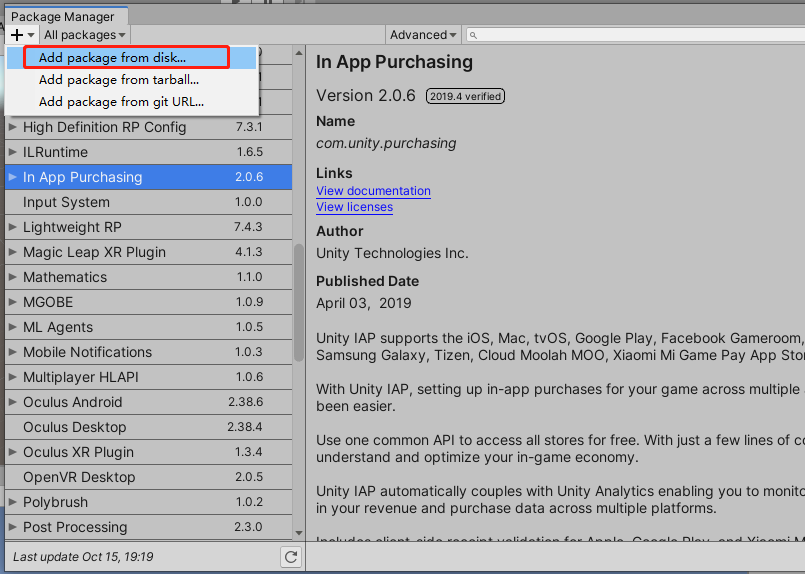
Fig 4.3 Load package from disk
Here will pop up a dialogue box. Click to open package.json file under SDK file folder:
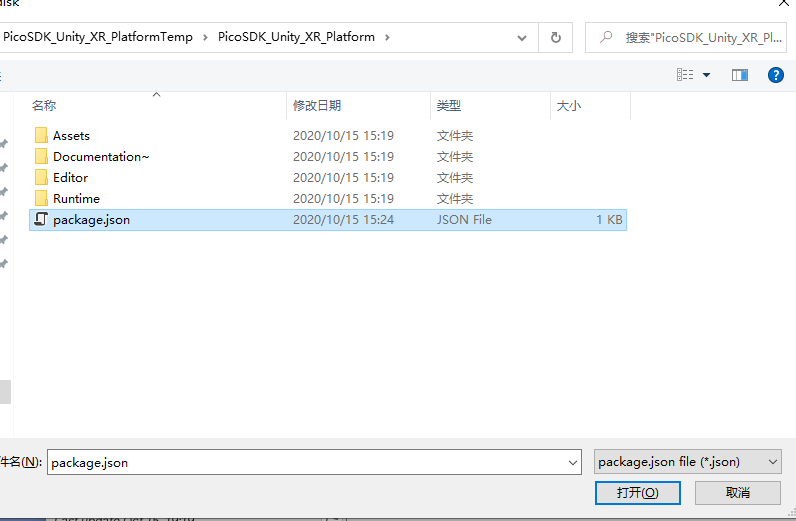
Fig 4.4 Select json file
Then wait for the Unity progress bar to finish loading.
Step3:Use SDK
Enter Project Settings, and select PicoXR under XR Plug-in Management option.
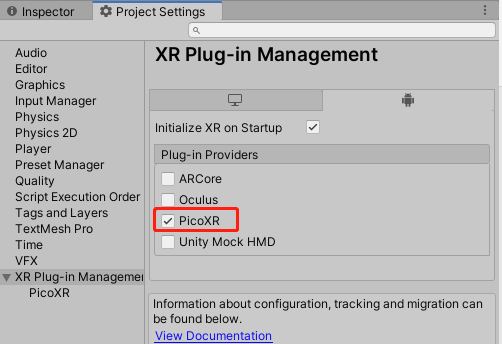
Fig 4.5 Select PicoXR
Create an empty scene, right click and select “Room-Scale XR Rig” to build an XR module, just as shown in Fig 4.6:
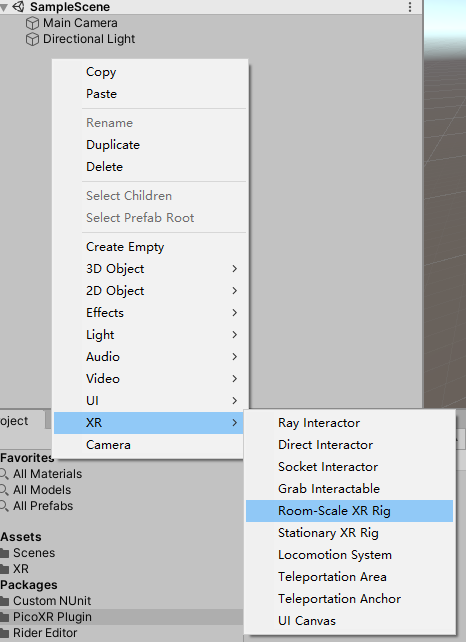
Fig 4.6 Build XR scene
Add PXR_Manager script for XR Rig:
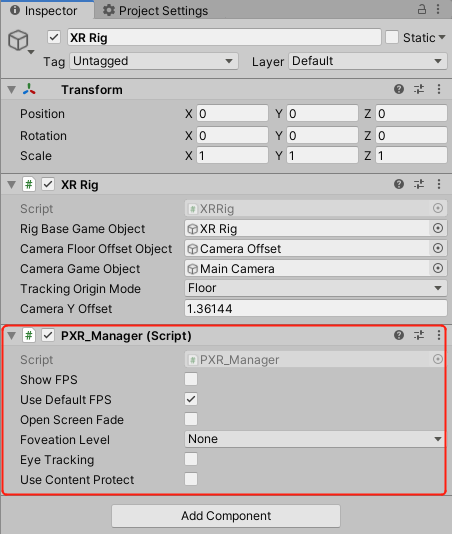
Fig 4.7 Add PXR_Manager script
Step4:Packaging
When packaging, save the current scenes, then enter File>Build Settings, and click “Add Current” to add the current scene to the building list. Select “Android” under Platform, then click “Switch Platform” and finally click “Build” to complete the packaging.
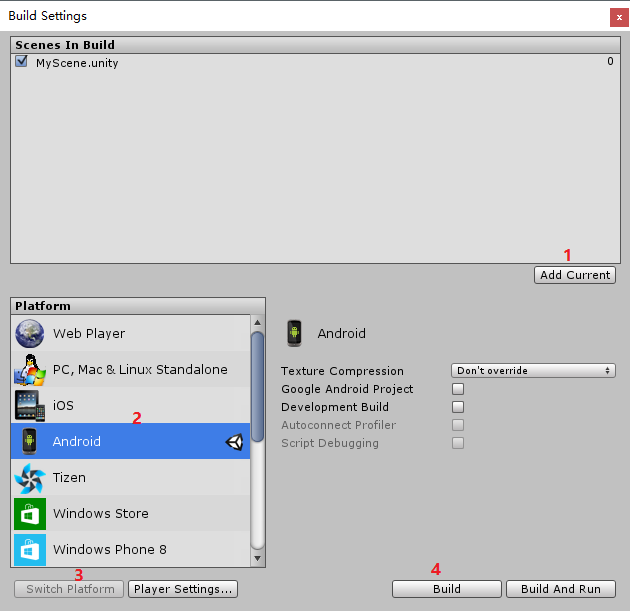
Fig 4.8 Packaging
This is a complete process of how to import this SDK. Specific SDK adaptation methods for various hardware products of Pico VR will be given in detail in the following chapters.