6 Performance Optimization Guide
6.1 Frame Rate and Scenes Requirements
Frame rate:
Frame rate for G2 4K should be no less than 30 frames and more than 45 frames is recommended. Frame rate for Neo 2 should be more than 60. Frame rate for Neo3 should be 72.
Scenes:
The triangular patch of the model being rendered in the camera view is controlled within 100,000
The amount of model vertices being rendered in the camera view is controlled within 100,000
The amount of common unity lights such as electric light sources is controlled within 50
The amount of ordinary unity particle systems is controlled within 50
Try to use the more efficient Unity shader
Examples of optimization methods:
Reduce the amount of fixed points on model faces when guaranteed to be displayed
Share the material and animation
Use a compressed texture format
Use as few lighting effects as possible
Use static batch processing
Optimize scripts to reduce complexity. Limit memory usage, CPU usage and other resource consumption
6.2 Advanced Rendering Methods
6.2.1 Foveated rendering
Foveated rendering optimizes the ability to render scenes by providing high resolution for the center of the field of view, and greatly reducing peripheral views the details of the scene.
For more information, see: Chapter 8.6 Foveated Rendering.
6.2.2 SinglePass
SinglePass is based on native Unity Single Pass feature. It uses one camera to fulfill stereo rendering, reducing half of Draw Call and Occlusion Culling. Using this feature can increase frame rate dramatically in complex scenes. But SinglePass don’t support post processing. This option will take effect in all scenes.
For more information, see: Chapter 8.9 SinglePass
6.2.3 URP configuration
For URP related information, please refer to https://docs.unity3d.com/Packages/com.unity.render-pipelines.universal@10.3/manual/whats-new/urp-whats-new.html.
Here, Unity 2019.4.2f1 is taken as an example.
- Open Window/Package Manager
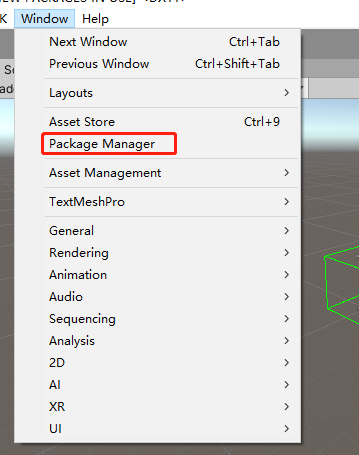
Fig 6.1 Window toolbar
- Select Show preview packages
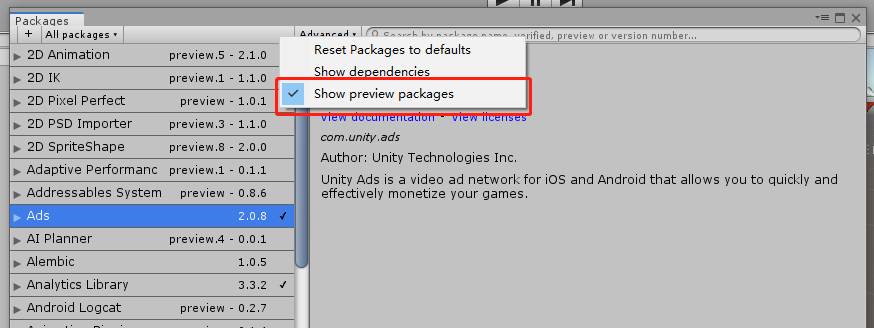
Fig 6.2 The advanced option of Packages
- Under “Universal PR”, click Install in the bottom right.
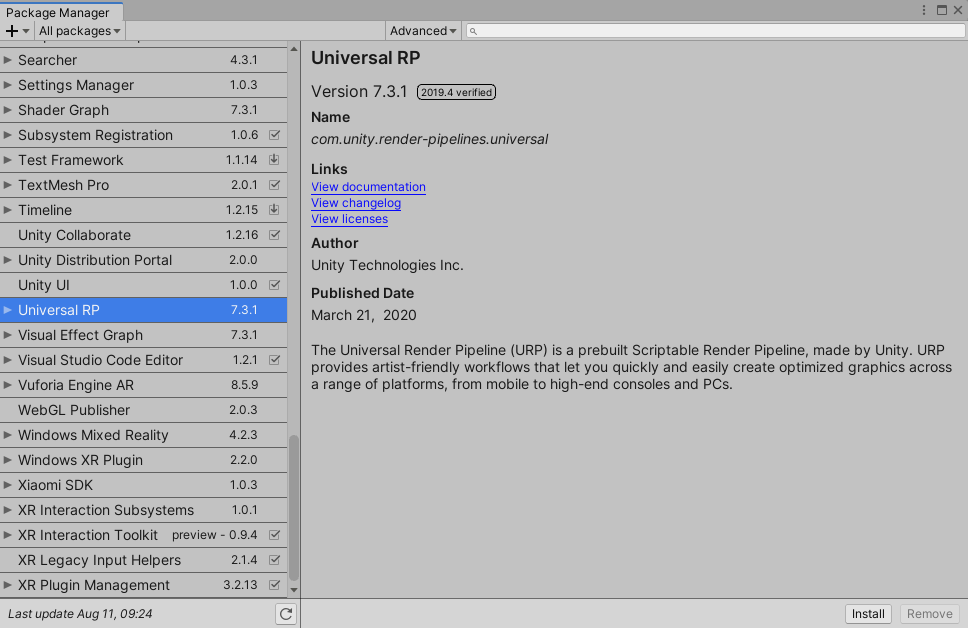
Fig 6.3 Install the URP
- Create Universal Render Pipeline Asset
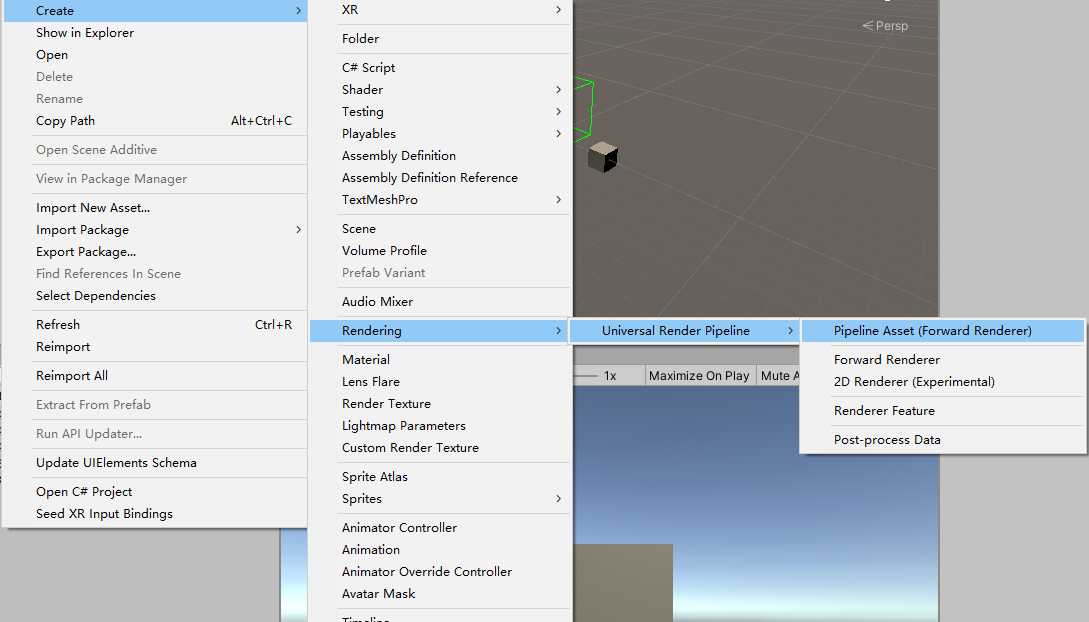
Fig 6.4 Create URP Asset
- Use UniversalRenderPipelineAsset
Drag and drop the file created in Step 4 to Scriptable Render Pipeline Setting field in Project Setting/Graphics
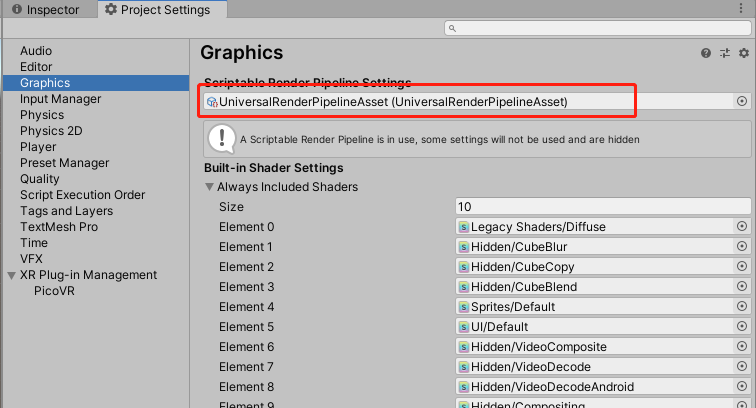
Fig 6.5 Use URP Asset
- Replace materials in the project with URP materials
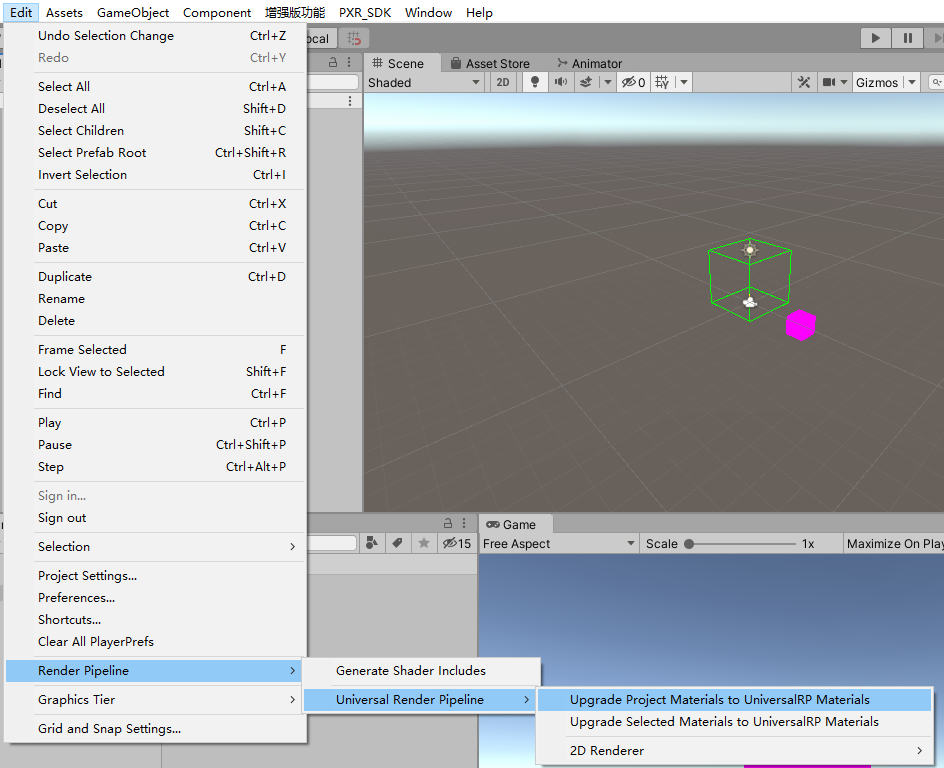
Fig 6.6 Update materials in the project
6.2.4 VR compositor layers
The “VR Compositor Layers” is useful for displaying information, text, video, and textures “intended to be the focal point of the scene”, and can also be used to display simple scene environments and backgrounds. See Chapter 8.7 VR Compositor Layers for details.
6.3 Mitigate HMD Overheating
1. Check the current frame rate on VR application.
To turn on real-time display of frame rate using PXR_Manager, follow the instructions in Chapter 8.1 “Display frame rate”.
Another approach to enable real-time display of frame rate on the device. Go to 2D settings -> System -> User configuration. Under Special Settings, turn on Info of the VR frame rate.
2. Enable Foveated Rendering. Setting the Foveation Level to High is recommended.