8 Advanced features
8.1 Configure EyeBuffer size
SDK supports responding to Unreal’s “vr.pixeldensity” command. Developers can use this command to configure the size of EyeBuffer.
Instructions:
- Method 1: Open the file Project/Config/DefaultEngine.ini, and then add the string “vr.pixeldensity = 1” under the “[/Script/Engine.RendererSettings]” tag. If the value is equal to one or there is no value set, EyeBuffer size is set to Pico’s default size. If the value is not equal to one, it will be scaled based on Pico’s default EyeBuffer size. Example below:
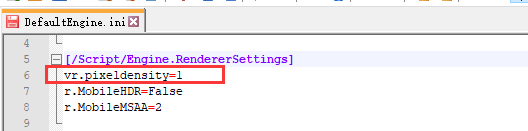
Figure 8.1 Configure Eyebuffer size
- Method 2: This setup can also be done by executing console command through the blueprint. Using the node “Execute Console Command” node, invoke the “vr.pixeldensity 1” command (there is a space between the string and the number in the command). The same number part is a multiple of EyeBuffer. It is recommended to execute this command right after EventBeginPlay to make sure initialize works in the correct timing sequence.
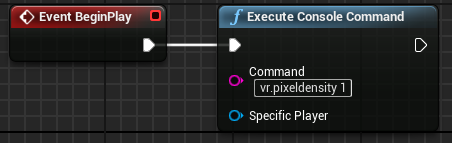
Figure 8.2 Configure Eyebuffer size
Tips:
It is recommended that developers do not make changes, and only use custom RenderTexture sizes for special need occasions. For this option, the developer must understand the following two points:
- If the RT setting is too small, it will improve the performance and reduce the delay, but it will also reduce the resolution.
- If the RT setting is too large, it will reduce performance and increase latency. Therefore, it is not recommended that the RT setting exceed the hardware recommended texture size.
Recommended scale: 0.5~2
8.2 Eye Tracking
Pico Neo3 Pro devices support eye tracking. Eye tracking can track the position of eye gaze, and rendering performance can be optimized with fixation point rendering. The switch of eye tracking function is in Project Settings > Plugins > PicoXRSetting, and check “EnableEyeTracking” to turn on the eye tracking function. As shown in the picture: Set in PicoXRSettings

Figure 8.3 Eye Tracking
It’s applicable to acquire eye tracking position and direction using Blueprints. Please check chapter 7.4 for details.
8.3 Foveated Rendering
Foveated rendering can help optimize VR scene rendering by providing full resolution (lossless) for the central focus area and lowering resolution of peripheral areas (outside the central focus area).
Foveated Rendering can be enabled through the following two methods:
- Before packaging, check “Enable FoveationRendering” under “Project Settings”→ “Plugins”→”PicoXR Settings”, and select the designated level in dropdown menu of “Foveation Level”(SDK provides Low/Med/High levels by default).
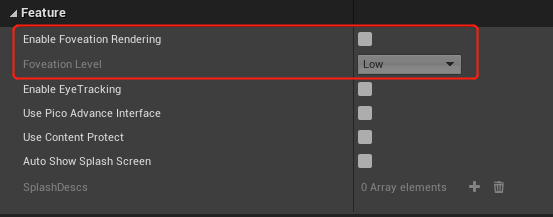
Figure 8.4 FFR Settings
- After packaging, FFR level can be configured dynamically by using Blueprint. (note that “Enable FoveationRendering” must be checked before packaging) . Check chapter 7.5 for details.
8.4 Application Entitlement Protection
In order to cooperate with the copyright protection of developer applications by the developer platform and Pico Store, the SDK needs to perform license verification during the application development stage and after the official release to provide developers with an application copyright protection mechanism.
8.4.1 Simulation entitlement verification during development
In the development stage, developers simulate the copyright verification process by filling in the development machine SN number in the configuration interface and added the processing logic after the verification failed to test the effect.
Device SN is passed in through Edit - > Plugins - > OnlinePicoSettings - > Platform for development machine simulation permission verification.
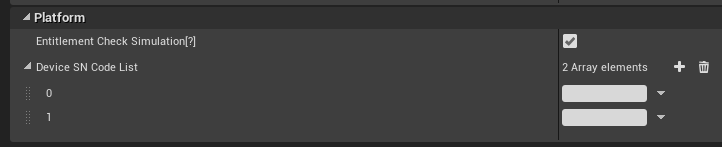
Figure 8.5 Entitlement verification simulation
8.4.2 AppID and Public Key entitlement verification
The App ID is the unique ID assigned to an app by the Pico Developer Platform. It can be applied and viewed at https://developer.pico-interactive.com/developer/overview .
In the latest SDK, the App ID is passed in from the App ID under the Project setting→Plugins →PicoXR Settings→Platform, and the SDK performs copyright verification when an app is started. Developers can obtain the verification result through the binding agent of the “Pico Entitlement Verify Set Callback Delegation” interface. Check chapter 7.6 for details
Notes: Development devices with SN number filled in the simulation verification process will pass the copyright protection verification by default after the app is uploaded to the Pico Store. No formal copyright verification will be carried out. If developers need to carry out formal copyright verification on the development device after the app is on the Pico Store, please close the “Entitlement Check Simulation” when compiling the formal version.
8.5 MultiView
If you want to enable MultiView, you need to go to Unreal Editor> Settings> Project Settings> Engine> Rendering> VR, then select Mobile Multi-View and Mobile Multi-View Direct. The above two items must be checked to take effect.
Note: OpenGL ES2 does not support MultiView.
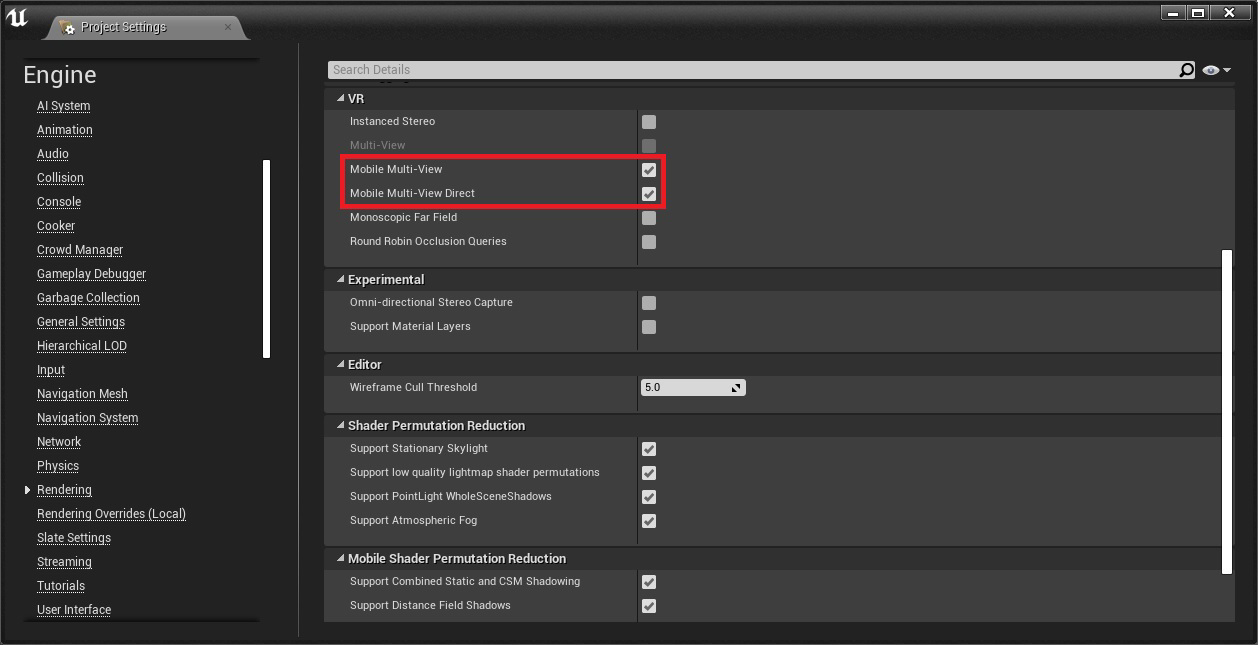
Figure 8.6 Open MultiView
8.6 StereoLayer
StereoLayer is a Layer component provided by UE4, which allows you to send a separate Texture to the headset and have it projected in a rendering path that is separate from the rest of the project.
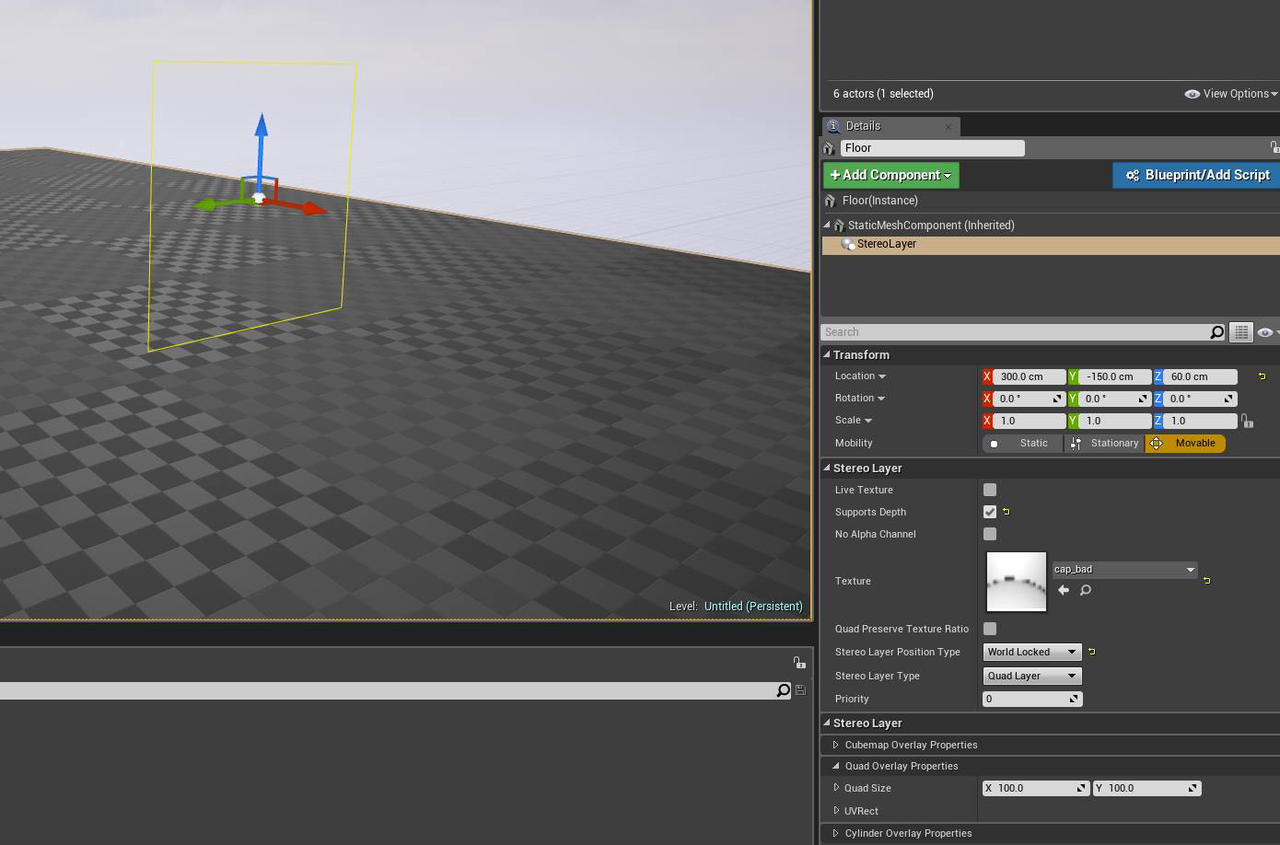
Figure 8.7 Overlay in the scene
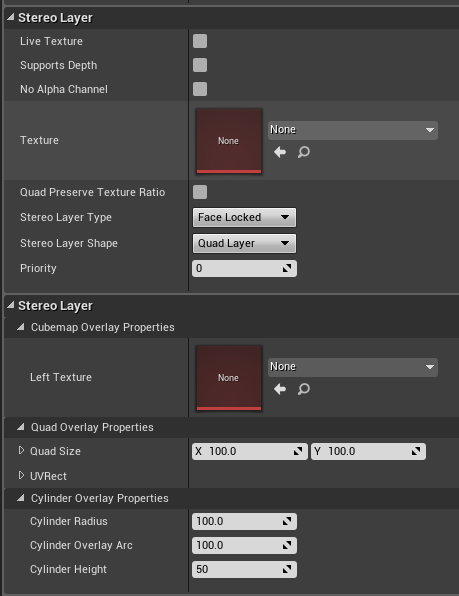
Figure 8.8 Stereo Layer Properties
Currently only the following properties of this component are supported: Texture、Stereo Layer Type、Stereo Layer Shape、Priority、Left Texture、Quad Size. Other properties will be implemented in successive versions.
How to create a StereoLayer:
- Create a Pawn actor. Drag it into level.
- Select Pawn or open the Pawn blueprint to add the Stereo Layer in Component.
- In Stereo Layer properties, the Stereo Layer Type can be selected as FaceLocked, WorldLocked, or TrackerLocked. The effects of FaceLocked and TrackerLocked are currently the same.
- Set Stereo Layer Shape as Quad Layer.
- Set Property to determine the hierarchy of multiple layers.
Note:
- It is recommended not to add Stereo Layer under the camera component.
- It is recommended to use the correct coordinate position relationship to place the models and layers. Otherwise there will be depth of field conflicts that will cause visual discomfort.
8.7 Pico VR Splash Screen
The SDK provides a way to display a specified texture when switching scenes, which is called SplashScreen. There are two ways to enable SplashScreen: through Project Settings or using Blueprints.
- Method 1: Use the project settings to enable SplashScreen.
Open project settings, and go to Plugins→PicoXR Settings→SplashScreen. The configuration interface is as follows:
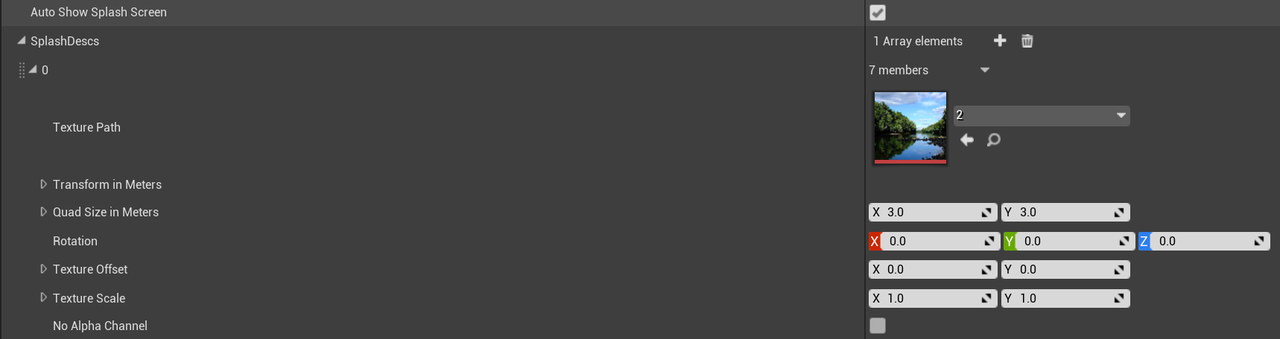
Figure 8.9 SplashScreen properties
| Property Name | Property Description |
| Enable Auto Show | Whether to display automatically. ( When switching to a new level, this option is required) |
| Texture Path | Select a Texture here. |
| Transform in Maters | Transform properties of textures in meters. |
| Quad Size in Maters | Displayed size of the quadrilateral texture. |
- Method 2: Using blueprints to enable SplashScreen. Check Chapter 7.7 for details
8.8 Boundary
Pico Neo devices work in 6Dof mode by default . In order to protect the safety of users, we have developed the Safety Boundary. It allows users to define a safe area. When the user leaves the safe area, headset will enter See Through mode to display real world view to prevent the user from bumping or other accidents.
SDK has opened some interfaces related to Boundary functions. Check chapter 7.9 for details:
8.9 Platform System
Pico SDK inherited Unreal OnlineSubSystem Module, and it implements part of the functionalities to allow developer use. Currently the module only supports Achievements.
To use OnlineSubSystem from Pico, follow the steps below:
- Step 1: Enable Online SubSystem Pico Plugin

Figure 8.10 Enable Online Subsystem Pico Plugin
- Step2: Disable all other plugins except Online SusSystem. Online SubSystem Utils under path Plugin→Online Platform.
- Step3: Create file AndroidEngine.ini under path [ProjectDirectory]/Config/Android/ and add following lines:
[OnlineSubsystem]
DefaultPlatformService=Pico
- Step4: Add following lines to [ProjectDirectory]/Source/[ProjectName]/ ProjectName.Build.cs to load essential modules:
PublicDependencyModuleNames.AddRange(new string[]{"OnlineSubsystem", "OnlineSubsystemPico" });
- Step5: Under Project Settings - > Plugins - > OnlinePicoSettings- > Payment, fill in all information (Is Foreign, Merchant ID, App ID, App Key, Pay Key).
8.9.1 Achievements System
Preparation
To use the achievement system, developers need to enter the developer platform and create applications. Click “Create” and complete information for required items.
To integrate the achievement system, it’s required to acquire the corresponding strings from developer platform.
Applying instructions as follow:
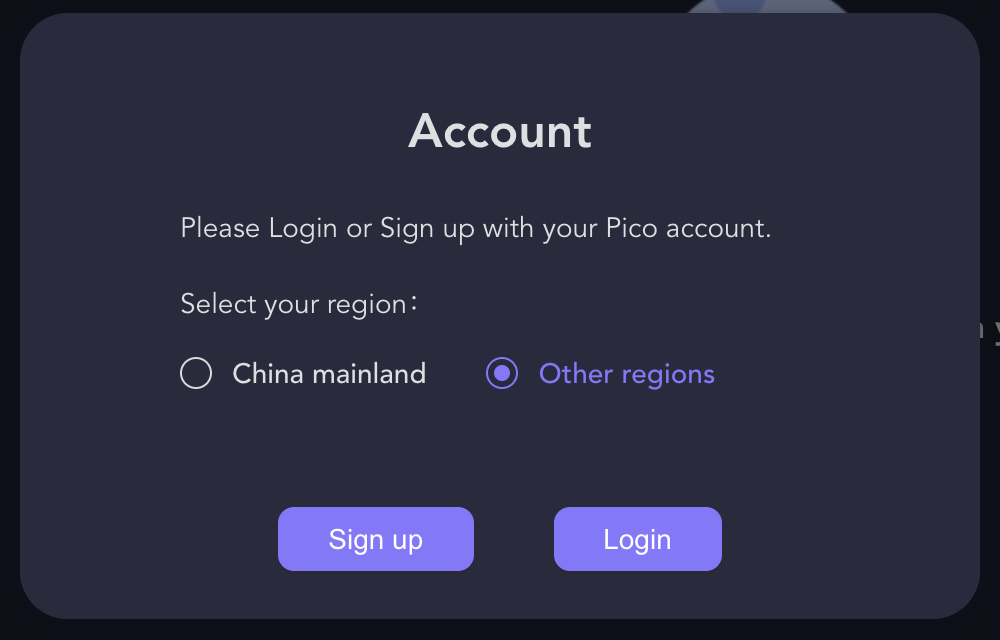
- Click the Become a Developer button on the Pico Developer Platform.
- In the Account pop-up window, select the region where your account is located: China mainland / Other regions and Sign up or Login
- Create an application
- Create achievement information
Click “Detail” to enter the detailed page of the application. If there’s no app, please create one first.
To integrate achievement, it’s required to create an application and acquire the application info. The steps are as follows:
- Select “Platform Service” and find “Achievement”, click to enter
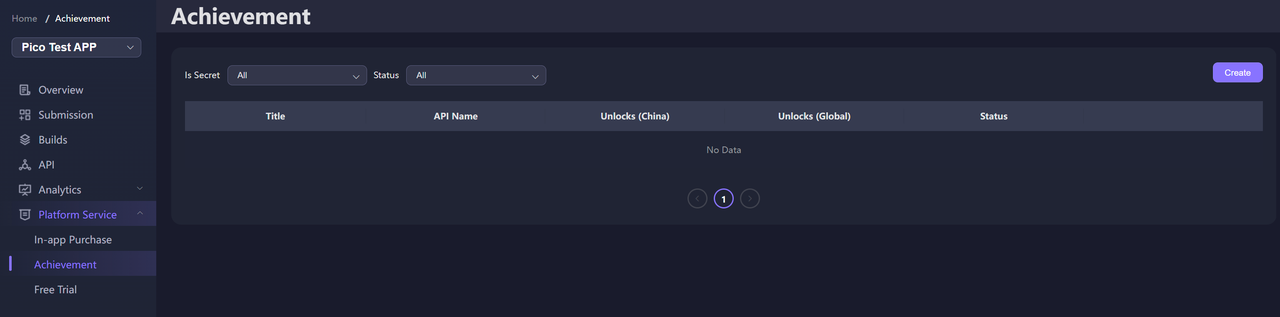
Figure 8.9.1 Developer Platform
On the Achievement page you can find all the achievements you have created. If you don’t have any achievements yet, click Create.
Complete the achievement follow the required information. The API name (i.e. API Name) must be the same as the one in the code.
Achievements SDK interface instructions:
Description of the type of achievement:
Simple: Unlock by achieving a single event or goal completion, no achievement progress;
Count: Counter type, unlocked when the specified target number is accomplished (e.g. completes 5 unlocks, target value = 5)
Bit: Bit field type, unlocked when the specified target number of the specified range is reached (e.g. completes 3 unlocks of the 7 specified targets, the target value = 3, and the bit field length = 7)
Note: Due to the length limit of int32 type, length of the Bit type cannot exceed 10, and the target value of the Count type cannot exceed 2147483648. The following is an interface description for the achievements section:
- Initialization interface:
FOnlineSubsystemPico::InitWithAndroidPlatform(FPicoInitOnCompleteDelegate&& Delegate)
This interface is used to initialize achievement system. Calling it will initialize and return initialization result with a Delegate. Calling this interface requires users to login their accounts in PUI and it also requires developer to fill in the fields in Project -> PicoXR Settings -> Platform with corresponding parameters (Details in Chapter 8.11). To prevent issues when user switch the account when application is pushed to background, it is required to call this interface when apps resumes. Please check sample codes below for calling this:
void UAchievementWidgetClass::InitPicoOnlineSubSystem()
{
    OnlineSubsystemPico*PicoSubsystem=static_cast<FOnlineSubsystemPico*>(IOnlineSubsystem::Get());
    if (PicoSubsystem)
    {
        PicoSubsystem->InitWithAndroidPlatform(FPicoInitOnCompleteDelegate::CreateUObject(this, &UAchievementWidgetClass::OnInitPicoSubSystemComplete));
    }
}
void UAchievementWidgetClass::OnInitPicoSubSystemComplete(bool Result)
{
}
Note: Some of the following interfaces require initializations while others do not. For those interfaces that require initialization, it will only initialize once.
- Send server request for achievement definitions and cache to local storage.
IOnlineAchievements::QueryAchievementDescriptions( const FUniqueNetId& PlayerId, const FOnQueryAchievementsCompleteDelegate& Delegate)
This interface will cache all defined achievement info to local, and Delegate will return the results of the request. Calling this interface does not require initialization. Sample code follows:
void UAchievementWidgetClass::QueryDescriptions()
{
     auto AchievementInterface = Online::GetAchievementsInterface();
     auto UserID = new FUniqueNetIdPico(0);
     if (AchievementInterface)
     {
         AchievementInterface->QueryAchievementDescriptions(*UserID, FOnQueryAchievementsCompleteDelegate::CreateUObject(this, &UAchievementWidgetClass::OnQueryDescriptionsComplete));
     }
}
void UAchievementWidgetClass::OnQueryDescriptionsComplete(const FUniqueNetId& PlayerId, const bool bWasSuccessful)
{
}
- Request all achievement progress and cache to local.
IOnlineAchievements::QueryAchievements( const FUniqueNetId& PlayerId, const FOnQueryAchievementsCompleteDelegate& Delegate)
This interface will cache current progress of achievement info to local, and Delegate will return the results of the test. It is required to call initialization interface and QueryAchievementDescriptions before calling this interface. Sample code as follows:
void UAchievementWidgetClass::QueryAchievement()
{
    auto AchievementInterface = Online::GetAchievementsInterface();
    auto UserID = new FUniqueNetIdPico(0);
    if (AchievementInterface)
    {
        AchievementInterface->QueryAchievements(*UserID, FOnQueryAchievementsCompleteDelegate::CreateUObject(this, &UAchievementWidgetClass::OnQueryAchievementComplete));
    }
}

void UAchievementWidgetClass::OnQueryAchievementComplete (const FUniqueNetId& PlayerId, const bool bWasSuccessful)
{

}
- Rewrite achievement progress.
IOnlineAchievements::WriteAchievements(const FUniqueNetId& PlayerId, FOnlineAchievementsWriteRef& WriteObject, const FOnAchievementsWrittenDelegate& Delegate)
This interface can rewrite progress of the achievement. Input the name of achievement and expected progress using WriteObject. Delegate will return the results of the test. It is required to call initialization interface and QueryAchievementDescriptions before calling this interface. Sample code as follows:
void UAchievementWidgetClass::WriteAchievement(FString AchievementName, int32 Value)
{
    auto AchievementInterface = Online::GetAchievementsInterface();
    auto UserID = new FUniqueNetIdPico(0);
    if (AchievementInterface)
    {
        FOnlineAchievementsWritePtr WriteObject = MakeShareable(new FOnlineAchievementsWrite());
        WriteObject->SetIntStat(*AchievementName, Value);
        FOnlineAchievementsWriteRef WriteObjectRef = WriteObject.ToSharedRef();
        AchievementInterface->WriteAchievements(*UserID, WriteObjectRef, FOnAchievementsWrittenDelegate::CreateUObject(this, &UAchievementWidgetClass::OnAchievementsWritten));
    }
}

void UAchievementWidgetClass::OnAchievementsWritten(const FUniqueNetId& PlayerId, const bool bWasSuccessful)
{

}
- Get progress of all cached achievements.
IOnlineAchievements::GetCachedAchievements(const FUniqueNetId& PlayerId, TArray<FOnlineAchievement>& OutAchievements)
This interface gets all local cached progress of achievements. It is required to call initialization interface and QueryAchievementDescriptions before calling this interface. Sample code as follows:
auto AchievementInterface = Online::GetAchievementsInterface();
auto UserID = new FUniqueNetIdPico(0);
TArray<FOnlineAchievement>Achievements;
if (AchievementInterface)
{
    auto State = AchievementInterface->GetCachedAchievements(*UserID, Achievements);
}
- Get progress of cached achievements by name.
IOnlineAchievements::GetCachedAchievement(const FUniqueNetId& PlayerId, const FString& AchievementId, FOnlineAchievement& OutAchievement)
This interface gets the progress of cached achievements by its name. It is required to call initialization interface and QueryAchievementDescriptions before calling this interface. Sample code as follows:
auto AchievementInterface = Online::GetAchievementsInterface();
auto UserID = new FUniqueNetIdPico(0);
FOnlineAchievement Achievement;
if (AchievementInterface)
{
    auto State = AchievementInterface->GetCachedAchievement(*UserID, AchievementName, Achievement);
}
- Get definition of cached achievements by name.
IOnlineAchievements::GetCachedAchievement( const FUniqueNetId& PlayerId, const FString& AchievementId, FOnlineAchievement& OutAchievement)
This interface gets the definition of cached achievements by its name. It is required to call initialization interface and QueryAchievementDescriptions before calling this interface. Sample code as follows:
auto AchievementInterface = Online::GetAchievementsInterface();
auto UserID = new FUniqueNetIdPico(0);
FOnlineAchievement Achievement;
if (AchievementInterface)
{
    auto State = AchievementInterface->GetCachedAchievement(*UserID, AchievementName, Achievement);
}
8.10 Configure Screen Refresh Rate
The SDK provides a method to configure the screen refresh rate. It is configured by options in Display Refresh Rates as follow:
- Default: Use system default setting
- RefreshRate72: Refresh Rate is 72Hz
- RefreshRate90: Refresh Rate is 90Hz
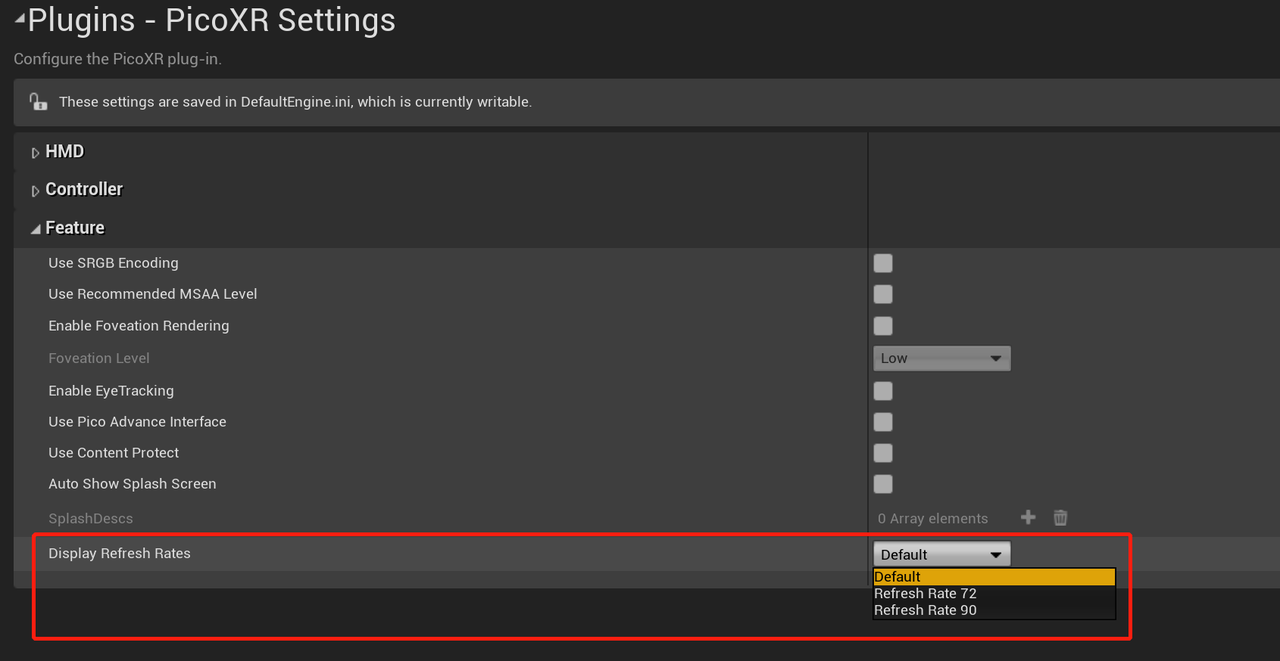
Figure 8.15 Screen Refresh Rate Settings
8.11 Advanced guardian
Scenarios: When the guardian on one device needs to be exported to other devices. The maximum support area is 10m * 10m.
Applicable Device: Pico Neo 3 Pro/Pico Neo 3 Pro Eye
Precedures:
- When a user has a map created, it’s applicable to call PXRSaveLargeSpaceMap interface to save the file to other devices. PXRExportMaps interface can be used to export the map file. PXRImportMaps can be used to import the map file. Detailed usage can be found in Chapter 7.9 Advanced Guardian. Othere device and share this same map in one coordinate and there’s no need to launch from the same position. Details as follow:
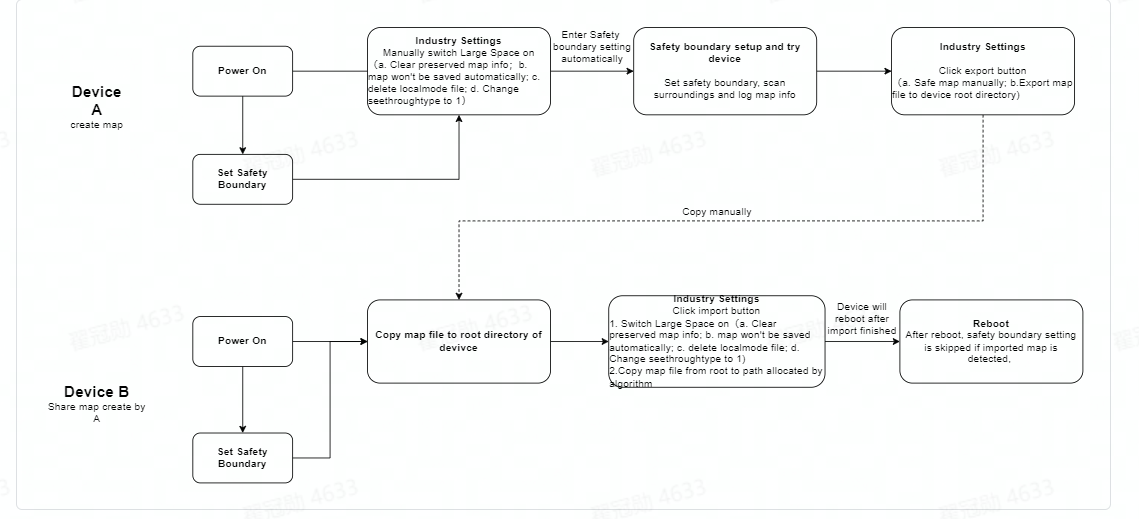
Figure 8.16 Advanced guardian workflow
- Enter Edit -> Project Settings…, expand OnlinePico Settings under Plugins. Check the following options in sequence: “Use Pico Advance Interface”, “Enable Large Space”, then the advanced guardian support is enabled. As shown below in figure 8.17, it’s applicable to call PXRSetLargeSpaceEnable interface to manipulate during runtime. Details can be found in chapter 7.9.
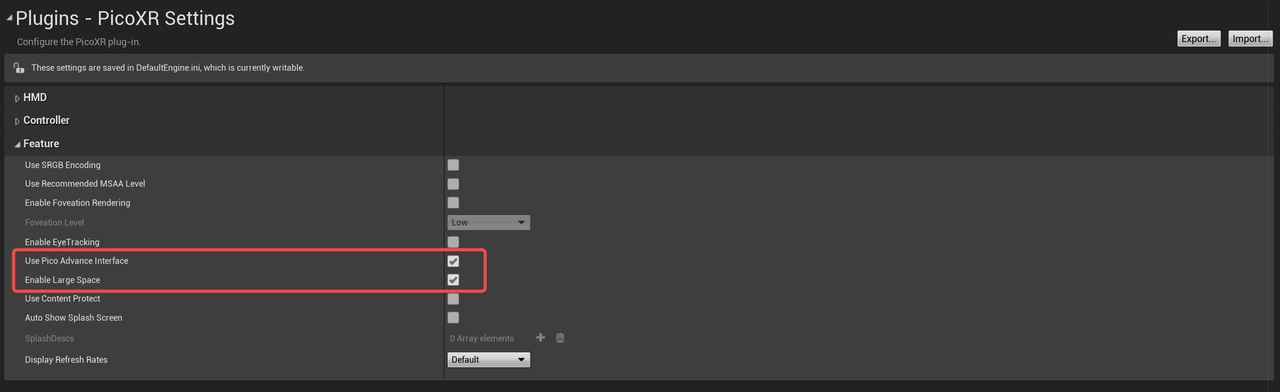
Figure 8.17 Options for advanced guardian
- In the application, call PXRSwitchLargeSpaceScene blueprint interface to enable runtime advanced guardian. Details can be found in chapter 7.9