7 Advanced feature
7.1 Configure EyeBuffer size
SDK supports responding to Unreal’s “vr.pixeldensity” command. Developers can use this command to configure the size of EyeBuffer (RenderTexture).
Instructions:
Method 1: Open the file Project / Config / DefaultEngine.ini, and then add the string “vr.pixeldensity = 1” under the “[/Script/Engine.RendererSettings]” tag. If the value is equal to one or there is no value set, EyeBuffer size is set to Pico’s default size. If the value is not equal to one, it will be scaled based on Pico’s default EyeBuffer size. As shown below:
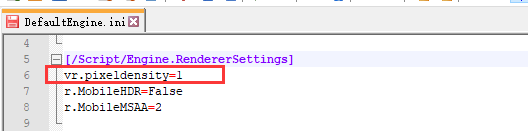
Figure 7.1 Configure Eyebuffer size
Method 2: This setup can also be done by execute console command through the blueprint. Using the node “Execute Console Command” node, invoke the “vr.pixeldensity 1” command (there is a space between the string and the number in the command). The same number part is a multiple of EyeBuffer. It is recommended to execute this command right after EventBeginPlay to make sure initialization work in correct timing sequence.
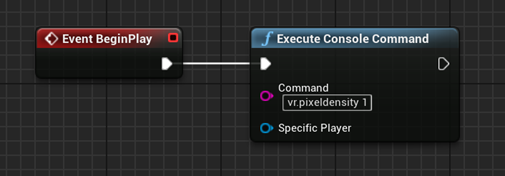
Figure 7.2 Configure Eyebuffer size
The function of configuring the EyeBuffer size through the “Multiples of RT size” parameter in Project Settings> Plugins> PicoMobile has been deprecated.
Tips:
It is recommended that developers do not make changes, and only use custom RenderTexture sizes for special needs occasions. For this option, the developer must understand the following two points:
- If the RT setting is too small, it will improve the performance and reduce the delay, but it will also reduce the resolution.
- If the RT setting is too large, it will reduce performance and increase latency. Therefore, it is not recommended that the RT setting exceed the hardware recommended texture size.
- Applicable RT size ranges from 0.5 to 2.
7.2 Eye tracking
Pico Neo2 Eye devices support eye tracking functions. Eye tracking module can keep track of the position user is focusing. When using together with foveated rendering, this feature can help optimize rendering performance. This feature can be enabled by checking “Enable EyeTracking” option in “Project Settings” -> “Plugins” > “Pico Mobile” as shown in Fig 7.3
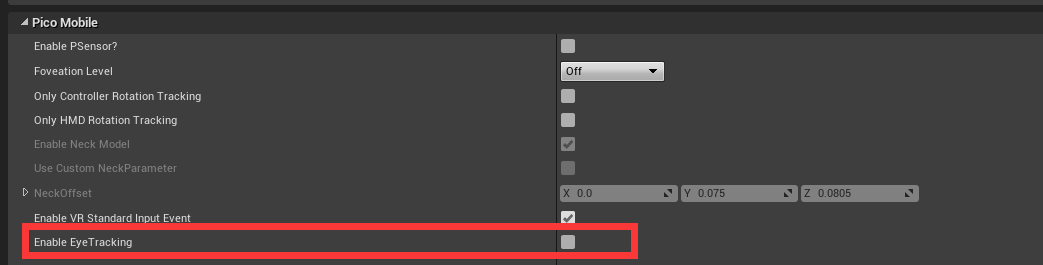
Figure 7.3 Eye Tracking
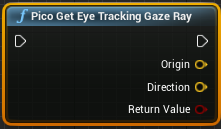
The position and direction of eyeballs can be acquired following the steps below:
|
Function | Get eye-tracking origin and direction(only supported on Neo 2 and this requires to check “Enable Eye Tracking” in Project Settings) |
| Input | None | |
| Output | Eye tracking origin and direction | |
| Return Value | True:Success,False:Failure |
7.3 Foveated Rendering
Foveated rendering can help optimize VR scene rendering by providing full resolution (lossless) for the central focus area and lowering resolution of peripheral areas (outside the central focus area).
Foveated Rendering can be enabled in following two methods:
- Before packaging, check “Enable FoveationRendering” under “Project Settings” -> “Plugins” > “Pico Mobile”, and select the designated level in dropdown menu of “Foveation Level” (SDK provides Low/Med/High levels by default).
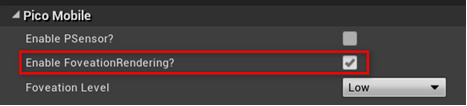
Figure 7.4 FFR Settings
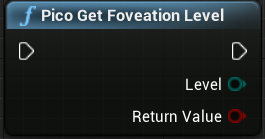
- After packaging, FFR level can be configured dynamically by using Blueprint (note that “Enable FoveationRendering” must be checked before packaging)
|
Function | Get Foveation Rendering level |
| Input | None | |
| Output | Foveation Rendering level | |
| Return Value | True:Success,False:Failure |
|
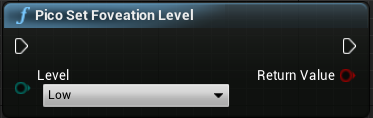
Function | Set Foveation Rendering level |
| Input | Foveation Rendering level | |
| Output | None | |
| Return Value | True:Success,False:Failure |
|
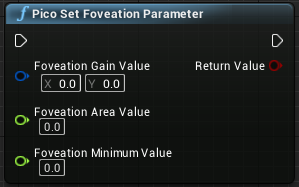
Function | Set Foveation Rendering parameters |
| Input | Foveation Rendering control parameters | |
| Output | None | |
| Return Value | True:Success,False:Failure |
Foveation Gain:Vector2 Type,Resolution scale down ratio along X/Y axis, resolution drop more when this value is higher.
Foveation Area:float Type, An area defined with gazing point as center and Foveation Area as radius, in which resolution is maintained.
Foveation Minimum:float Type, Smallest pixel density limit
Foveation Level:Predefined with 4 levels, Low, Med, High and Top High.
Note: It is recommended that developers apply the officially pre-defined level unless they know “Foveation Rendering” well and can use the self-defined parameters to adjust the FFR optimization details. SDK offers four levels:
Low [3.0f, 3.0f, 1.0f, 0.125f]
Med [4.0f, 4.0f, 1.0f, 0.125f]
High [6.0f, 6.0f, 1.0f, 0.0625f]
Top High [7.0f, 7.0f, 0.0f, 0.0625f]
7.4 Application Entitlement Protection
In order to cooperate with the developer platform and application store for copyright protection of developer applications, the SDK needs to perform license verification during the application development phase and after its official release to provide developers with application copyright protection mechanisms. To use the above two functions, please enter the Project setting-> Plugins ->PicoMobile ->Platform, and Check the User Entitlement Check option.
Copyright protection test does not require connection to the Internet, the SDK provides a return code that is the results of the validation, but no extra processing is done. Developers need to conduct on its own in the program in case the copyright protection is failed. For example, if you receive “not successful” as a result, show the user the failure reason and exit the application, or enter Demo mode, and prompt the user to go to Pico Store to buy the full version.
7.4.1 Simulation permission verification during development
In the development stage, developers simulate the copyright verification process by filling in the development machine SN number in the configuration interface, and added the processing logic after the verification failed to test the effect.
Under the premise that the User Entitlement Check option is checked, check the Entitlement Check Simulation option to enable simulation permission verfication during development. Device SN is passed through the Device SN Code List in the Project setting -> Plugins -> PicoMobile -> Platform.
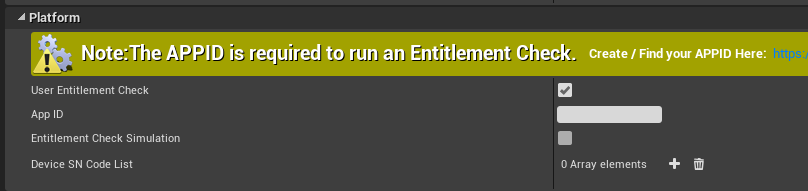
Figure 7.5 Entitlement check simulation
7.4.2 Entitlement protection after official release
The App ID is the unique ID assigned to an app by the Pico Developer Platform. It can be applied and viewed at https://developer.pico-interactive.com/developer/overview.
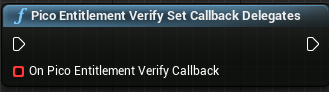
In the latest SDK, the App ID is passed in from the App ID under the Project setting -> Plugins -> PicoMobile -> Platform, and the SDK performs copyright verification when an app is started. Developers can obtain the verification result through the binding agent of the “Pico Entitlement Verify Set Callback Delegates” interface.
Blueprint of Entitlement Check Callback Results
|
Function | Return the verification result code |
| Input | None | |
| Output | None | |
| Return Value | None |
The verification result is as follows:
| Code | Implication |
| 0 | Succeed |
| -2 | Service does not exist |
| -3 | Service binding failed |
| -4 | Catch exception code |
| -5 | Time out |
| 10 | The package name is missing |
| 11 | The App ID is missing |
| 13 | The package name and App ID do not match |
| 20 | The user has not logged in |
| 21 | The user has not purchased |
| 31 | The app was not found |
| 32 | The purchase SN number does not match the device SN number |
Notes: Development devices with SN number filled in the simulation verification process will pass the copyright protection verification by default after the app is uploaded to the Pico Store, and no formal copyright verification will be carried out. If developers need to carry out formal copyright verification on the development device after the app is on the Pico Store, please close the “Entitlement Check Simulation” when compiling the formal version.
7.5 MultiView
If you want to enable MultiView, you need to go to Unreal Editor> Settings> Project Settings> Engine> Rendering> VR, then select Mobile Multi-View and Mobile Multi-View Direct. The above two items must be checked to take effect. Note: MultiView needs to be enabled under OpenGL ES3.1. OpenGL ES2 does not support MultiView.
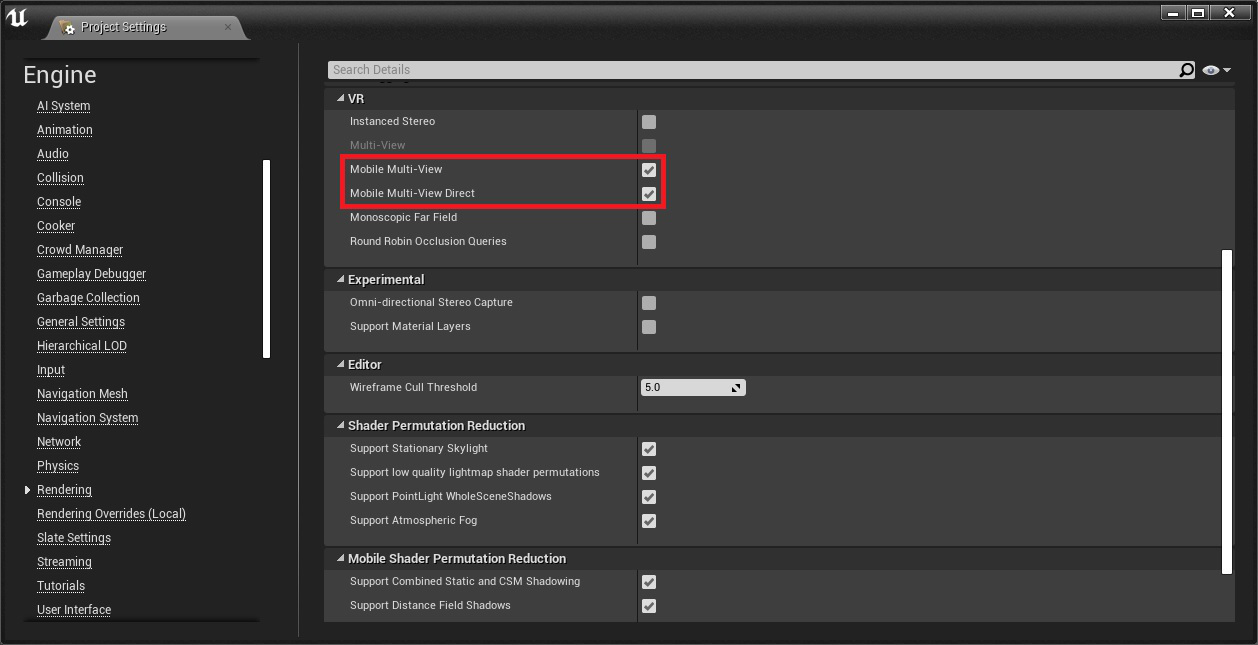
Figure 7.6 Open MultiView
7.6 Pico VR Compositor Layers (StereoLayer)
StereoLayer is a Layer component provided by UE4, which allows you to send a separate Texture to the headset and have it re-projected in a separate rendering path than the rest of the project.
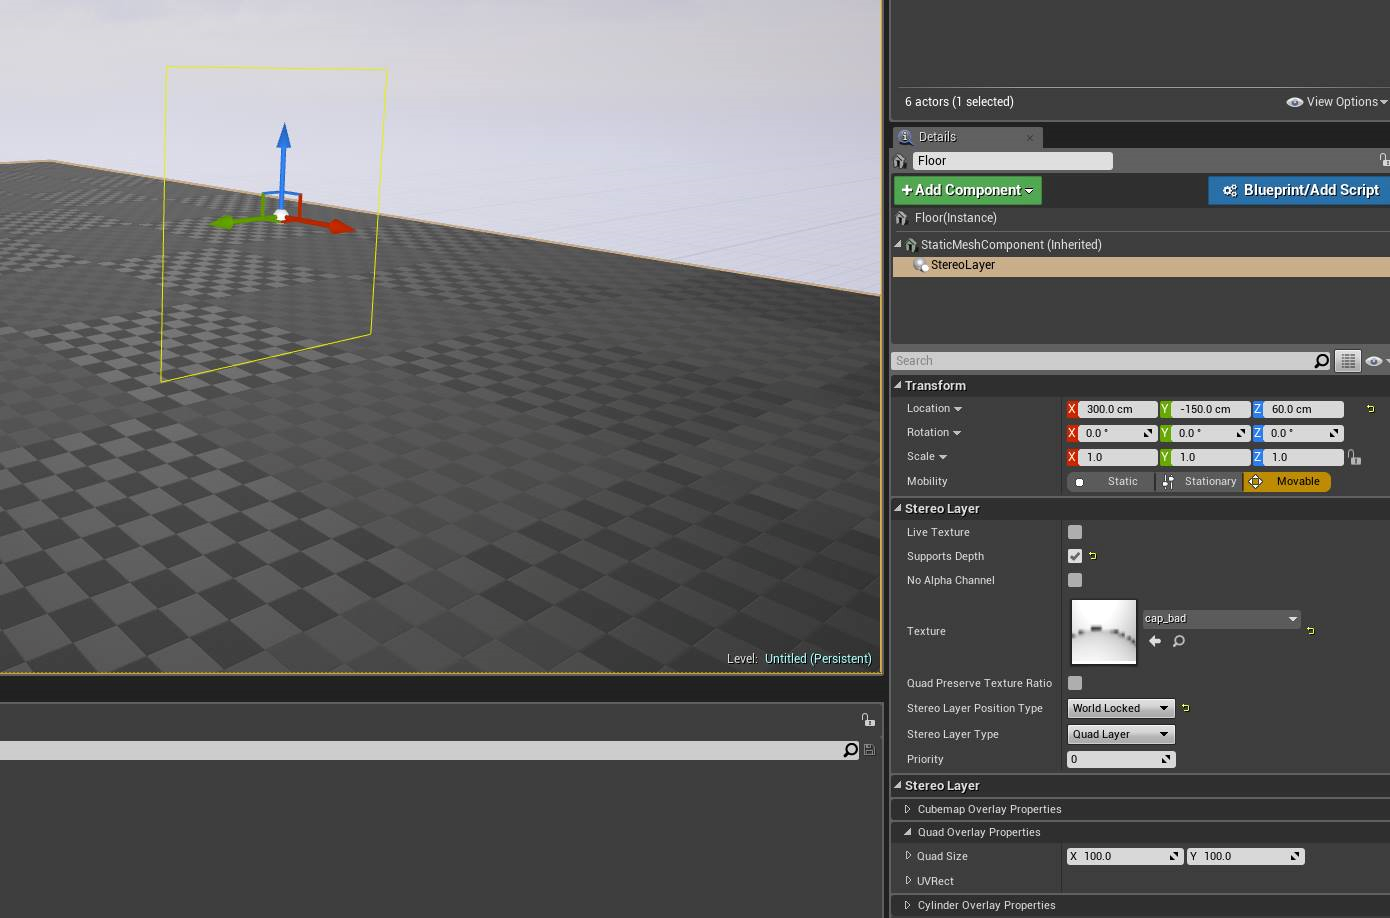
Figure 7.7 Overlay in the scene
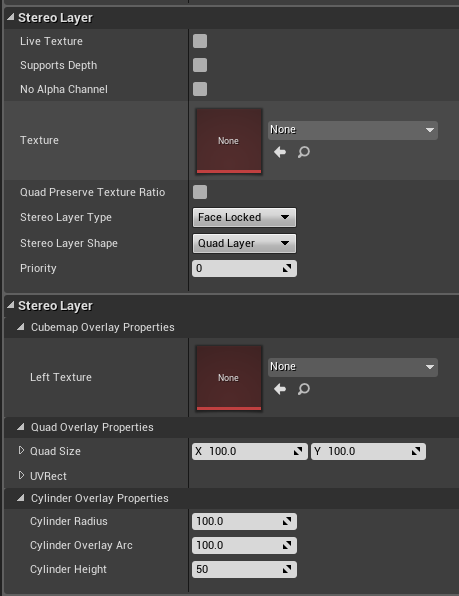
Figure 7.8 Stereo Layer Properties
Currently only the following properties of this component are supported:Texture、Stereo Layer Type、Stereo Layer Shape、Priority、Left Texture、Quad Size. Other properties will be implemented in successive versions.
How to create a StereoLayer:
- Create a Pawn actor. Drag it into level.
- Select Pawn or open the Pawn blueprint to add the Stereo Layer in Component.
- In Stereo Layer properties, the Stereo Layer Type can be selected as FaceLocked, WorldLocked, or TrackerLocked. The effects of FaceLocked and TrackerLocked are currently the same.
- Set Stereo Layer Shape to Quad Layer.
- Set Property to determine the hierarchy of multiple layers.
Note:
- It is recommended not to add Stereo Layer under the camera component.
- It is recommended to use the correct coordinate position relationship to place the models and layers, otherwise there will be depth of field conflicts that will cause visual discomfort.
7.7 Pico VR Splash Screen
The SDK provides a way to display a specified texture when switching scenes, which is called SplashScreen. There are two ways to enable SplashScreen: through Project Settings or using Blueprints.
Method 1: Use the project settings to enable SplashScreen.
Open project settings,and go to: Plugins->PicoMobile->SplashScreen (the configuration interface is as follows):
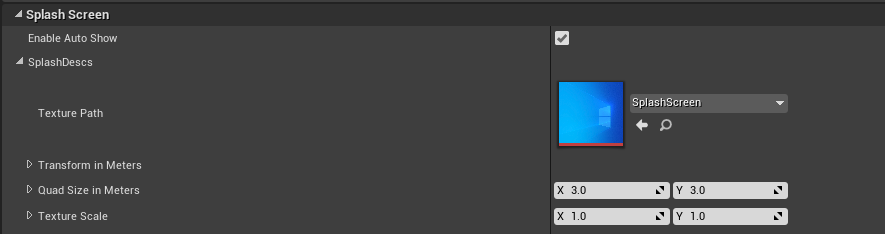
Figure 7.9 SplashScreen properties
| Property Name | Property Description |
| Enable Auto Show | Whether to display automatically. ( When switching to a new level, this option is required) |
| Texture Path | Select a Texture here |
| Transform in Maters | Transform properties of textures in meters |
| Quad Size in Maters | Displayed size of the quadrilateral texture. |
Table 7.1 Pico VRSplashScreen Property Interpretation
Method 2: Using blueprints to enable SplashScreen.

|
Function | Clear SplashScreen’s current property configuration (Splash Screen will be set to not display automatically) |
| Input | None | |
| Output | None | |
| Return Value | None |
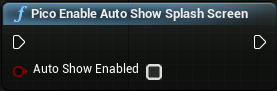
|
Function | Set whether to display SplashScreen automatically. |
| Input | Whether to display automatically | |
| Output | None | |
| Return Value | None |
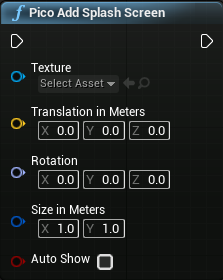
|
Function | Set SplashScreen Properties |
| Input | Texture, Translation in Meters, Rotation, Size in Maters, Auto Show (See Table 7.1 for the meaning of the properties) | |
| Output | None | |
| Return Value | None |
7.8 Platform System
Pico SDK inherited Unreal OnlineSubSystem Mobule and implements part of the functionalities to allow developers to use. Currently the module support only Achievements.
To use OnlineSubSystem from Pico, please follow steps below:
- Step1: Enable Online SubSystem Pico Plugin

Figure 7.10 Enable Online Subsystem Pico Plugin
- Step2: Disable all other plugins except Online SusSystem, Online SubSystem Utils under path Plugin -> Online Platform
- Step3:Create file AndroidEngine.ini under path [ProjectDirectory] / Config / Android/ and add following lines:
[OnlineSubsystem]
DefaultPlatformService=Pico
- Step4: Add following lines to [ProjectDirectory] / Source /[ ProjectName] / ProjectName.Build.cs to load essential modules
PublicDependencyModuleNames.AddRange(new string[]{"OnlineSubsystem", "OnlineSubsystemPico" });
7.8.1 Achievements System
Developers need to login Pico Dev Platform https://developer.pico-interactive.com/, and define achievements in App Management, following steps below:
- Click “View” for more operations. Creating first if you don’t have any App.
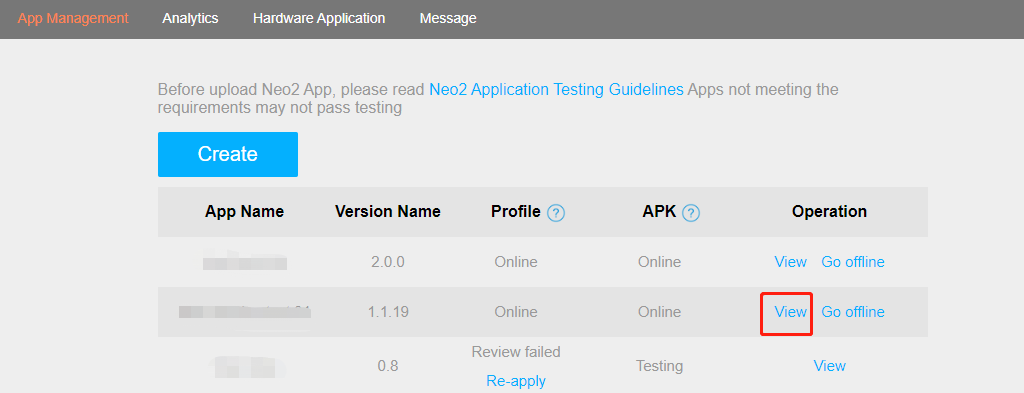
Figure 7.11 Developer Platform
- Click the button of “Platform - Achievements” at the bottom of viewing page.
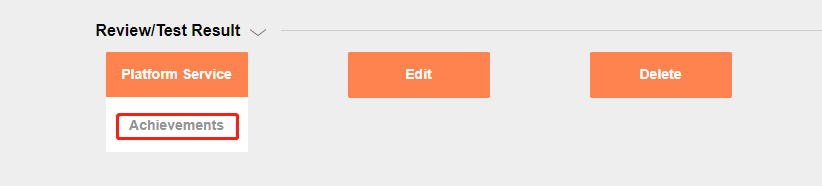
Figure 7.12 Developer Platform
- Browsing the list of achievements created. Click “Create” if you don’t have any achievement.
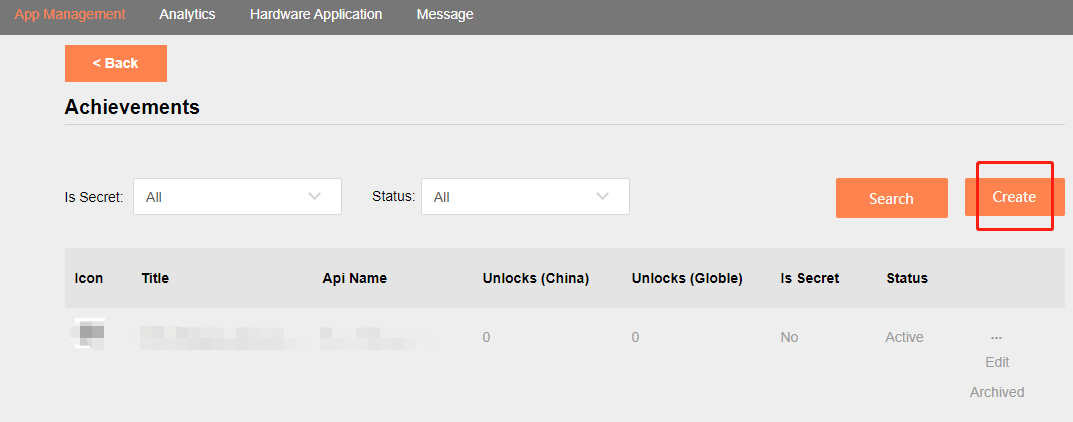
Figure 7.13 Developer Platform
- Fill in the fields of your achievement. API Name has to be consistent with your coding.
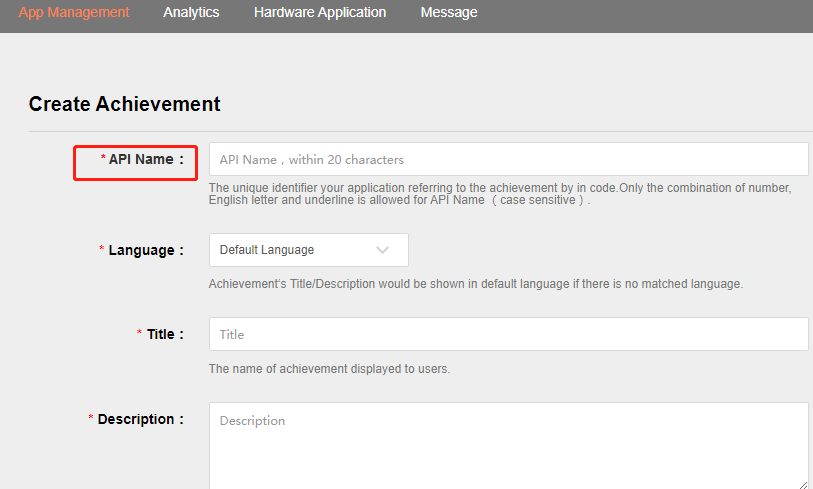
Figure 7.14 Developer Platform
Achievements SDK interface instructions:
- Initialization Interface:
FOnlineSubsystemPico::InitWithAndroidPlatform(FPicoInitOnCompleteDelegate&& Delegate)
This interface is used to initialize achievement system. Calling it will initialize and return initialization result with a Delegate. Calling this interface requires users to login their accounts in PUI and it also requires developer to fill in the fields in Project -> PicoMobile -> Platform with corresponding parameters (Details in Chapter 8.11). To prevent issues when user switch the account when application is pushed to background, it is required to call this interface when apps resumes. Please check sample codes below for calling this:
void UAchievementWidgetClass::InitPicoOnlineSubSystem()
{
    OnlineSubsystemPico*PicoSubsystem=static_cast<FOnlineSubsystemPico*>(IOnlineSubsystem::Get());
    if (PicoSubsystem)
    {
        PicoSubsystem->InitWithAndroidPlatform(FPicoInitOnCompleteDelegate::CreateUObject(this, &UAchievementWidgetClass::OnInitPicoSubSystemComplete));
    }
}
void UAchievementWidgetClass::OnInitPicoSubSystemComplete(bool Result)
{
}
Note: some of the following interfaces require initializations while the others don’t. For those interfaces that needs initialization, it only allows to initialize once.
- Send server request for achievement definitions and cache to local storage.
IOnlineAchievements::QueryAchievementDescriptions( const FUniqueNetId& PlayerId, const FOnQueryAchievementsCompleteDelegate& Delegate)
This interface will cache all defined achievement info to local, Delegate will return the resulf of whether the request success. Calling this interface doesn’t require initialization. Sample codes as follow:
void UAchievementWidgetClass::QueryDescriptions()
{
    auto AchievementInterface = Online::GetAchievementsInterface();
    auto UserID = new FUniqueNetIdPico(0);
    if (AchievementInterface)
    {
            AchievementInterface->QueryAchievementDescriptions(*UserID, FOnQueryAchievementsCompleteDelegate::CreateUObject(this, &UAchievementWidgetClass::OnQueryDescriptionsComplete));
    }
}

void UAchievementWidgetClass::OnQueryDescriptionsComplete(const FUniqueNetId& PlayerId, const bool bWasSuccessful)
{

}
- Request all achievement progress and cache to local
IOnlineAchievements::QueryAchievements( const FUniqueNetId& PlayerId, const FOnQueryAchievementsCompleteDelegate& Delegate)
This interface will cache current progress of achievement info to local, Delegate will return the result of whether the request success. It is required to call initialization interface and QueryAchievementDescriptions before calling this interface. Sample code as follow:
void UAchievementWidgetClass:: QueryAchievement()
{
    auto AchievementInterface = Online::GetAchievementsInterface();
    auto UserID = new FUniqueNetIdPico(0);
    if (AchievementInterface)
    {
            AchievementInterface->QueryAchievements(*UserID, FOnQueryAchievementsCompleteDelegate::CreateUObject(this, &UAchievementWidgetClass::OnQueryAchievementComplete));
    }
}

void UAchievementWidgetClass:: OnQueryAchievementComplete (const FUniqueNetId& PlayerId, const bool bWasSuccessful)
{

}
- Rewrite achievement progress
IOnlineAchievements::WriteAchievements(const FUniqueNetId& PlayerId, FOnlineAchievementsWriteRef& WriteObject, const FOnAchievementsWrittenDelegate& Delegate)
This interface can rewrite progress of achievement progress. Input the name of achievement and expected progress using WriteObject. Delegate will return the result of whether the request success. It is required to call initialization interface and QueryAchievementDescriptions before calling this interface. Sample code as follow:
void UAchievementWidgetClass::WriteAchievement(FString AchievementName, int32 Value)
{
    auto AchievementInterface = Online::GetAchievementsInterface();
    auto UserID = new FUniqueNetIdPico(0);
    if (AchievementInterface)
    {
            FOnlineAchievementsWritePtr WriteObject = MakeShareable(new FOnlineAchievementsWrite());
            WriteObject->SetIntStat(*AchievementName, Value);
            FOnlineAchievementsWriteRef WriteObjectRef = WriteObject.ToSharedRef();
            AchievementInterface->WriteAchievements(*UserID,
                WriteObjectRef,
                FOnAchievementsWrittenDelegate::CreateUObject(
                    this, &UAchievementWidgetClass::OnAchievementsWritten));
    }
}

void UAchievementWidgetClass:: OnAchievementsWritten(const FUniqueNetId& PlayerId, const bool bWasSuccessful)
{

}
- Get progress of all cached achievements
IOnlineAchievements::GetCachedAchievements(const FUniqueNetId& PlayerId, TArray<FOnlineAchievement>& OutAchievements)
This interface gets all local cached progress of achievements. It is required to call initialization interface and QueryAchievementDescriptions before calling this interface. Sample code as follow:
auto AchievementInterface = Online::GetAchievementsInterface();
auto UserID = new FUniqueNetIdPico(0);
TArray<FOnlineAchievement>Achievements;
if (AchievementInterface)
{
    auto State = AchievementInterface->GetCachedAchievements(*UserID, Achievements);
}
- Get progress of cached achievements by name
IOnlineAchievements:: GetCachedAchievement(const FUniqueNetId& PlayerId, const FString& AchievementId, FOnlineAchievement& OutAchievement)
This interface get the progress of cached achievements by its name. It is required to call initialization interface and QueryAchievementDescriptions before calling this interface. Sample code as follow:
auto AchievementInterface = Online::GetAchievementsInterface();
auto UserID = new FUniqueNetIdPico(0);
FOnlineAchievement Achievement;
if (AchievementInterface)
{
    auto State = AchievementInterface->GetCachedAchievement(*UserID, AchievementName, Achievement);
}
7、 Get definition of cached achievements by name
IOnlineAchievements::GetCachedAchievement( const FUniqueNetId& PlayerId, const FString& AchievementId, FOnlineAchievement& OutAchievement)
This interface get the definition of cached achievements by its name. It is required to call initialization interface and QueryAchievementDescriptions before calling this interface. Sample code as follow:
auto AchievementInterface = Online::GetAchievementsInterface();
auto UserID = new FUniqueNetIdPico(0);
FOnlineAchievement Achievement;
if (AchievementInterface)
{
    auto State = AchievementInterface->GetCachedAchievement(*UserID, AchievementName, Achievement);
}