4 Quick Start of SDK Access
Step1: Create a new Project
The blueprint and C++ project can be selected when creating a new project, and the blueprint Blank project template can be used as an example:
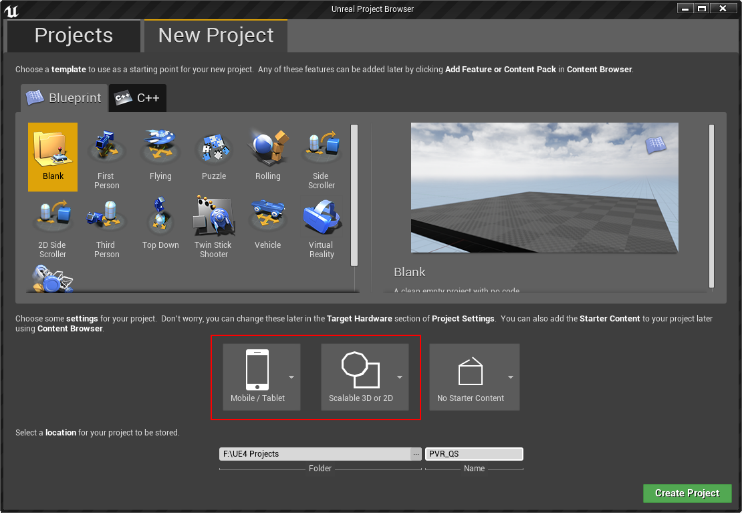
Figure 4.1 New project creating
Please ensure that the target hardware is: Mobile/Tablet,and the target image level is: Scalable 3D or 2D. In addition, the project name and project path should not be in Chinese.
Step2: Set up project
In order to be compatible with this SDK, the project should be set up as follows:
- Set the project’s Editor Start Map and Game Default Map: To do so, go to Edit->Project Setting->Project->Maps and Modes, and set the project’s Editor Start Map and Game Default Map as the previously maintained map.
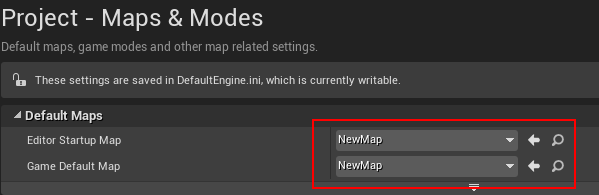
Figure 4.2 Map setting
- Clear the default virtual key: Go to Engine->Input->Mobile and clear the Default Touch Interface.

Figure 4.3 Game clearing default virtual key
- Go to Platforms->Android->APKPackaging, and check Enable “FullScreen Immersive on KitKat and above devices”.

Figure 4.4 System hiding virtual key
- Set the SDK and NDK versions of the Android platform: Go to Platforms->Android and set the Minimum SDK Version and Target SDK Version as 19 or higher;

Figure 4.5 SDK version setting
- Go to the Platforms->Android SDK, set the SDK API Level as matchndk, and set the NDK API Level as android-19 or higher.
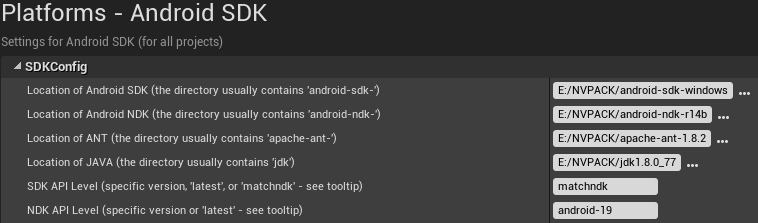
Figure 4.6 NDK version setting
- Close the Plugins that conflict with the SDK: Go to Edit→Plugins, uncheck all items under Built-in/Virtual Reality and all items under Built-in/Input Devices. At this point, the editor will send a restart prompt, and we should only close the editor directly.
Step3: Import SDK
Be sure to keep the editor closed and copy the extracted Plugins directory to the root directory of the project:
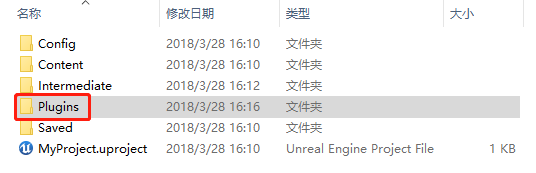
Figure 4.7 Import SDK into the directory
Then double click the project name and reopen it.
After the project is opened, our plug-in can be viewed under the Plugins page:
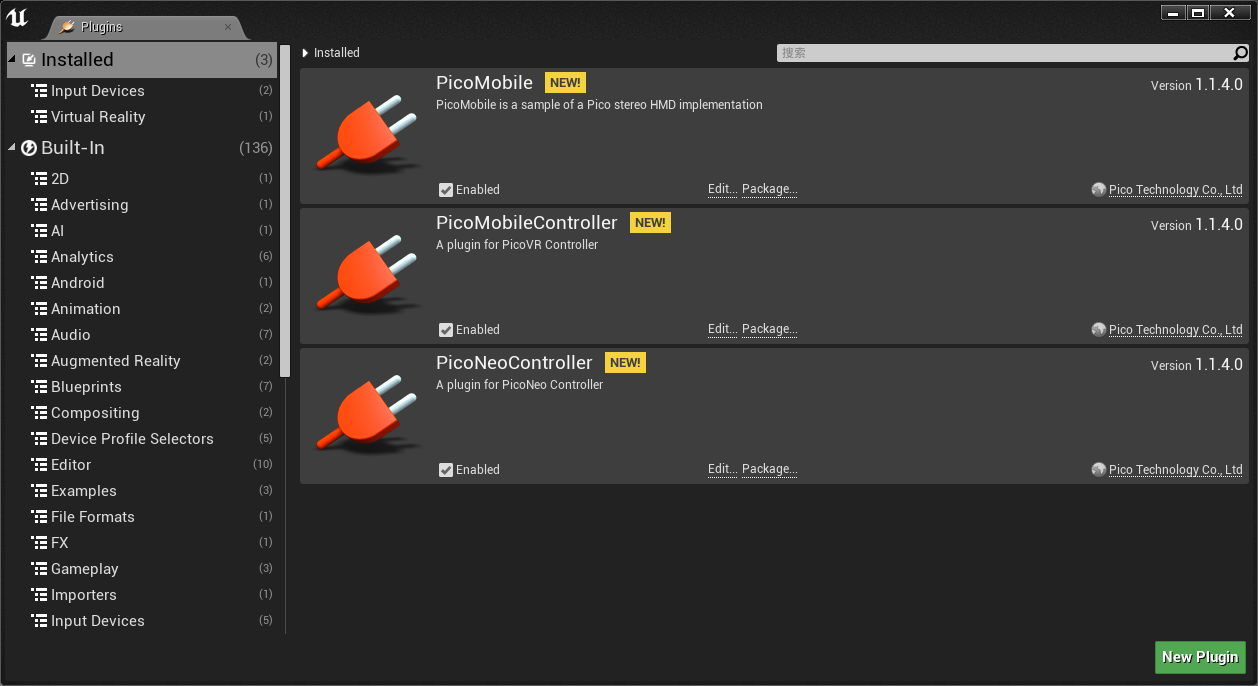
Figure 4.8 Pico-related plug-in
Step4: Project completion
- Create a new Pawn blueprint class, add a Scene component to its DefaultSceneRoot assembly, and then create a new Camera component under the Scene component:
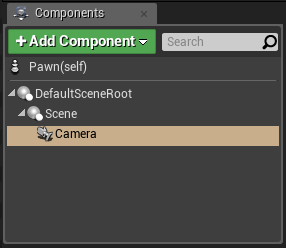
Figure 4.9 Pawn component structure
After it is packaged and mounted to the helmet, the relative position/ orientation of the Camera will be refreshed in real time according to the helmet, so that the head tracking and stereo rendering can be completed.
- Drag the Pawn into the scene and set its Auto Possess Player device as Player0:
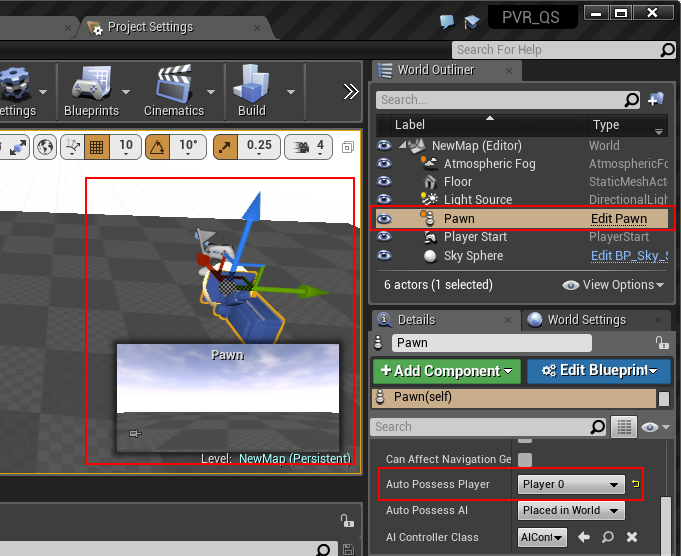
Figure 4.10 Drag the Pawn into the Scene
Step5: Project packaging
The texture compression format supported by Pico devices is ASTC, therefore, Android (ASTC) needs to be selected when the project is packaged. The specific packaging process is: In the editor, execute File -> Package Project -> Android -> Android (ASTC) , and then the packaging can be completed (in order to package the data into apk, it is recommended to enter “Project Settings” first, and then check the “Package game data inside .apk?” in Android which is a sub-item of Platforms ):
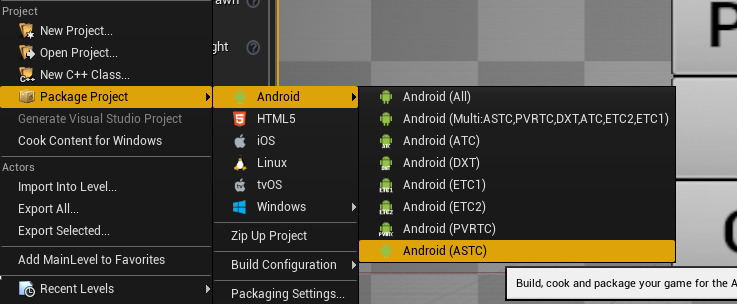
Figure 4.11 Packaging process
After packaging, double click “Install_Project name_Compile configuration-armv7-es2.bat for installation”:

Figure 4.12 Apk Installation