12 Frequently Asked Questions
Q1: How to modify rotating label in manifest file?
A: Confirm that the manifest file has not been replaced and needs to be replaced with the latest manifest file. Notice that the 180-degree rotation label has been changed
Label in V2.7.4:
<meta-data android:name=”com.picovr.type” android:value=”vr” />
<meta-data android:name=”com.picovr.display.orientation” android:value=”180” />
V2.7.6 and above labels:
<meta-data android:name=”pvr.app.type” android:value=”vr” />
<meta-data android:name=”pvr.display.orientation” android:value=”180” />
Q2: How to set Camera Culling Mask?
A: The attribute Culling Mask can be set in LeftEye of Pvr_UnitySDK and Camera of RightEye:
- Those that have adapted to the Cardboard SDK and used the toggle culling mask option can be done by modifying the Camer property directly.
- If you need to modify the toggle culling mask by code, please refer to the modification methods of ordinary camera.
- When the left eye and the right eye need to see different objects, the lefteye and righteye camera Culling Mask of PicoVR controls and displays the Layer. The left eye camera Culling Mask does not check the Layer of the right eye object and the righteye camera Culling Mask does not check the Layer of the lefteye object.
Q3: How to set the anti-aliasing?
A: It is set in the Inspector panel of Prefabs under Pvr_UnitySDK. X_1 is anti-aliasing not turned on.
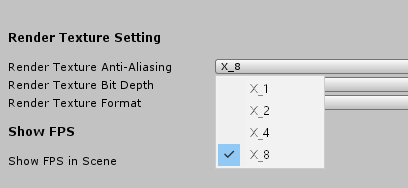
Figure 11.1 Setting of multiple anti-aliasing
Q4: How to implement the exit function in Pico devices?
A: The developers can realize the corresponding functions themselves or find the QuitGame.cs script under the AssetsPicoVRSDKScripts directory of SDK, drag it to PicoVR’s GameObject, and press the return key to exit at runtime. Note that in this way, the developers need to release the resources loaded dynamically by games or applications themselves.
Q5: How to apply sensor to other objects in the scenes?
A: Set up according to the following steps:
1 ) Uncheck the Pvr_UnitySDKHeadTrack script on head in PicoVR in the scenes:
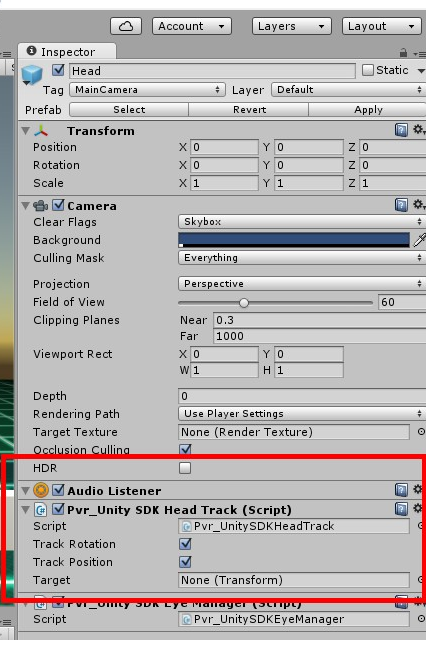
Figure 11.2 HeadTrack check setting
2 ) Select the desired object and add Pvr_UnitySDKHeadTrack script.
Q6: How to set the dragging function of the controller?
A: Please refer to the Pvr_Controller_UI scene under PicoMobileSDK/Pvr_Controller/Scenes.
The specific modification steps are as follows.
1 ) Add Pvr_UIPointer script on the model you want to use as control, such as dot under Pvr_Controller0
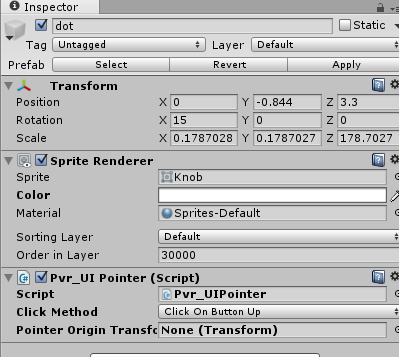
Figure 11.3 Pvr_UIPointer mounting instructions
2 ) Add Pvr_InputModule under Event and put the control point with Pvr_UIPointer into Element.
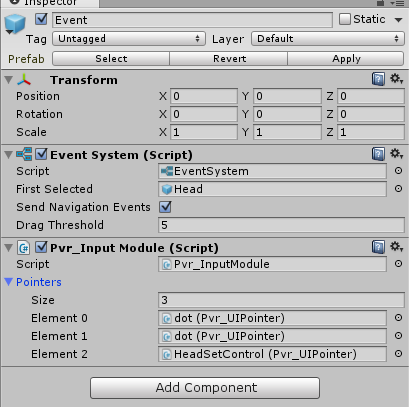
Figure 11.4 Description of Event Script
3 ) Mount Pvr_UICanvas and GraphicRaycaster on the Canvas to which the drag control belongs.
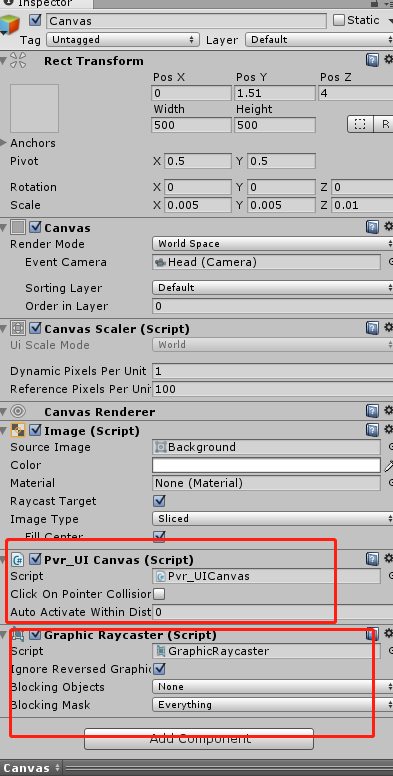
Figure 11.5 Instructions for setting of Canvas
4 ) Mount Pvr_UIDragbableItem and Canvas Group on the drag control.
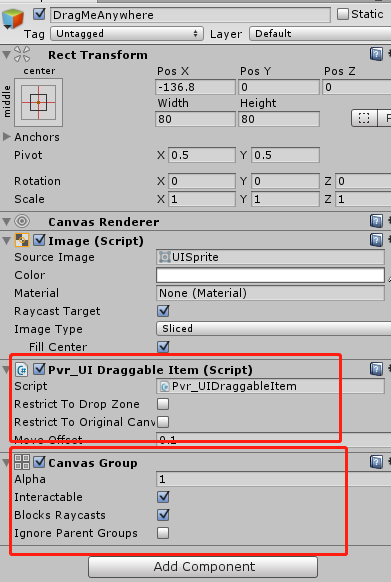
Figure 11.6 Explanation of the Draggable Item Script
Q7: How do you upgrade the PicoVR Unity SDK to the latest version?
A: The use of the SDK application for the first time can follow the steps described above for adaption.
For applications that have been adapted to the old version of SDK, if you want to upgrade them to the latest version of SDK, you need to follow the following steps:
1 ) Delete all files from the old PicoVR Unity SDK.
2 ) Import the new version of SDK UnityPackage, replace the old controller prefabs in the scenes with ControllerManager prefabs in the SDK, and the related functions attached to the old controller prefabs need to be transplanted into the new controller prefabs.
3 ) The PvrController0/ controller is the Pico’s controller model, which can automatically switch the model based on the type of controller currently connected.
4 ) White dots, rays, and models under PvrController0 will automatically display and hide according to the connection state of the controller.