5 Hardware Product Development Guide
This chapter will introduce the use method of SDK on Pico hardware products, and the developers should only choose to view the corresponding contents according to demands.
5.1 Pico Goblin/G2/G2 4K
5.1.1 Input instructions
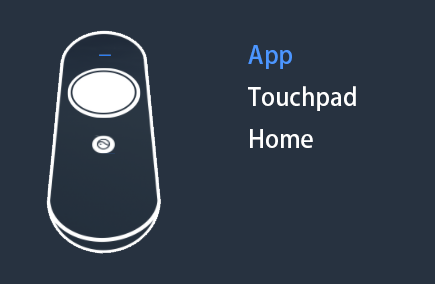
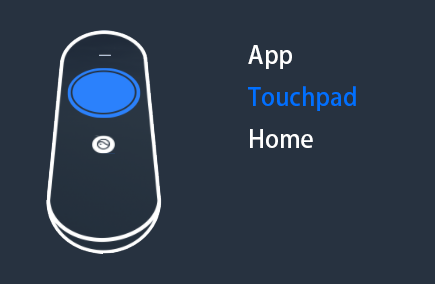
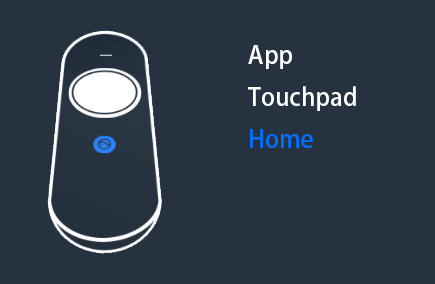
Goblin controller only supports 3dof function. When using the key and touchpad of the single controller, you need to call the interfaces related to the controller. Please refer to Section 6.5 in Chapter 6 List of API Interface Function for specific interfaces. Here, the corresponding relationship between the parameters of the following interfaces and the physical controller keys is introduced.
The Corresponding Relation between the Physical Key and the Parameters in API:
| Goblin controller key | Input binding |
|---|---|
|
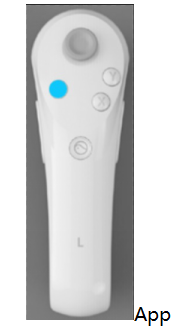
ButtonNum.app |
|
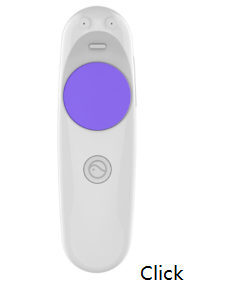
ButtonNum.click |
|
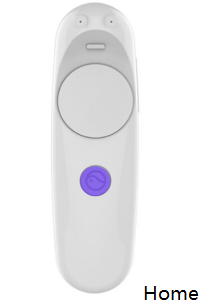
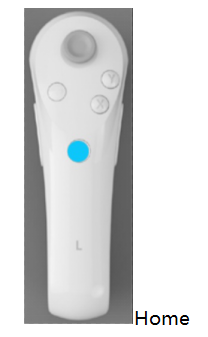
ButtonNum.home |

|
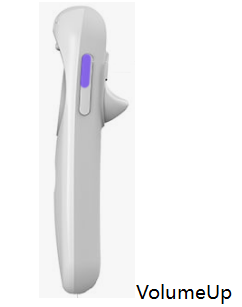
ButtonNum.VolumeUp |

|
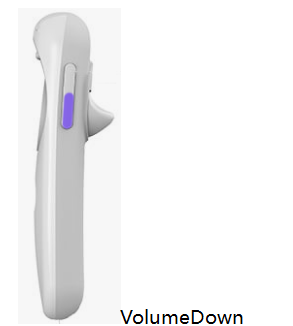
ButtonNum.VolumeDown |
Figure 5.1 Schematic Diagram of Goblin Keys
The physical keys of the G2 and G2 4K controllers are the same as that of the Goblin controllers except for the following two different keys.
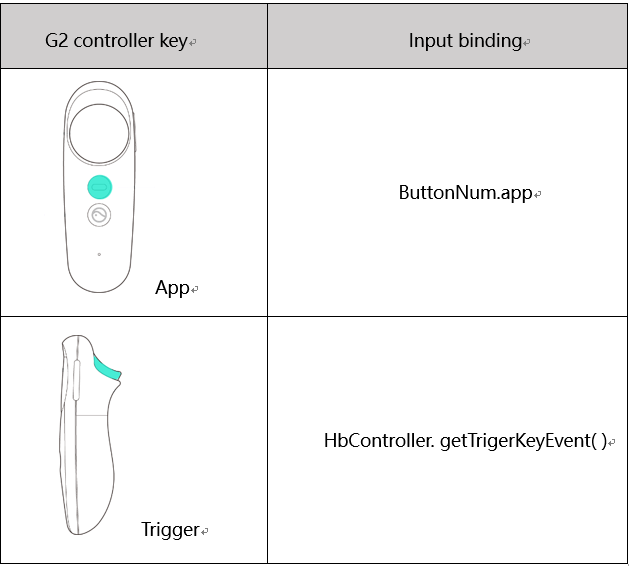
The schematic diagram of the coordinate system for the touchpad is as follows:
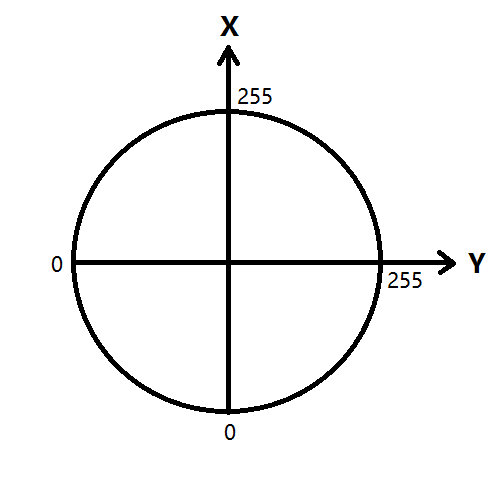
Figure 5.2 Schematic Diagram of Touchpad
5.2 Pico Neo
5.2.1 Input instructions
When using the keys and touchpads of double controllers, you need to call the interface API. See Section 6.5 for details. This Document only introduces the corresponding relationship of physical keys for the Pico Neo controller:
| Keys | Input binding |
|---|---|

|
ButtonNum.app |
|
ButtonNum.click |
|
ButtonNum.home |
|
ButtonNum.volumeUp |
|
ButtonNum.volumeDown |
|
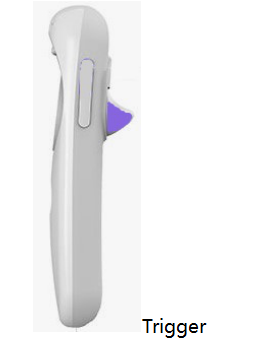
CVController.getTriggerNum( ) |
Figure 5.3 Schematic Diagram of Pico Neo Keys
In addition, the touchpad is identical to the Goblin controller and will not be repeated here.
5.3 Pico Neo2
5.3.1 Input instructions
Use the functions of Pico Neo2 controller. The API interface for Pico Neo2 is common with that of Pico Neo, see Section 6.5 for details. The following describes the physical keys of the Pico Neo2 controller:
| Keys | Input binding |
|---|---|
|
ButtonNum.home |
|
ButtonNum.app |
|
ButtonNum.click |
|
CVController.getTriggerNum( ) |
|
ButtonNum.buttonRG(only in left controller) |
|
ButtonNum.buttonLG(only in right controller) |
|
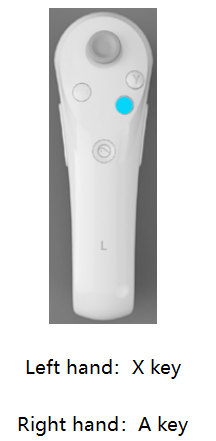
ButtonNum.buttonAX |
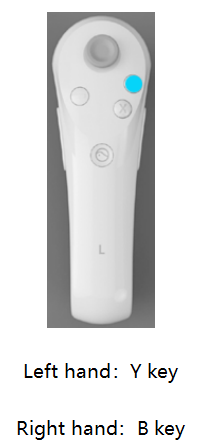
|
ButtonNum.buttonBY |
Figure 5.4 Schematic Diagram of Pico Neo2 Keys
On the Pico Neo2 controller, the joy stick is used to simulate the touchpad coordinates, which are same as Goblin controller. The coordinate system is shown in Figure 5.2.
5.4 Pico Neo3
5.4.1 Input instructions
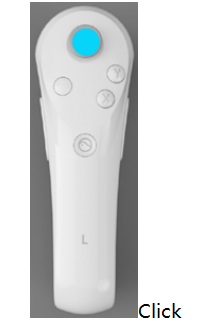
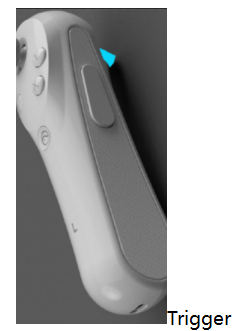
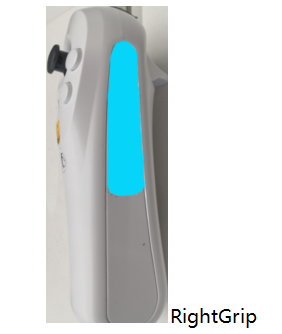
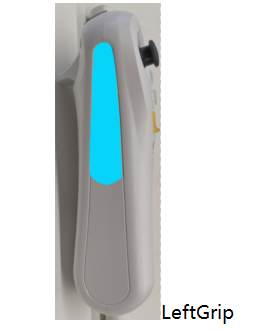
To use Pico Neo 3 controller features please check chapter 6.5 for detailed API descriptions. Following diagram introduces key mapping of Neo 3 controllers:
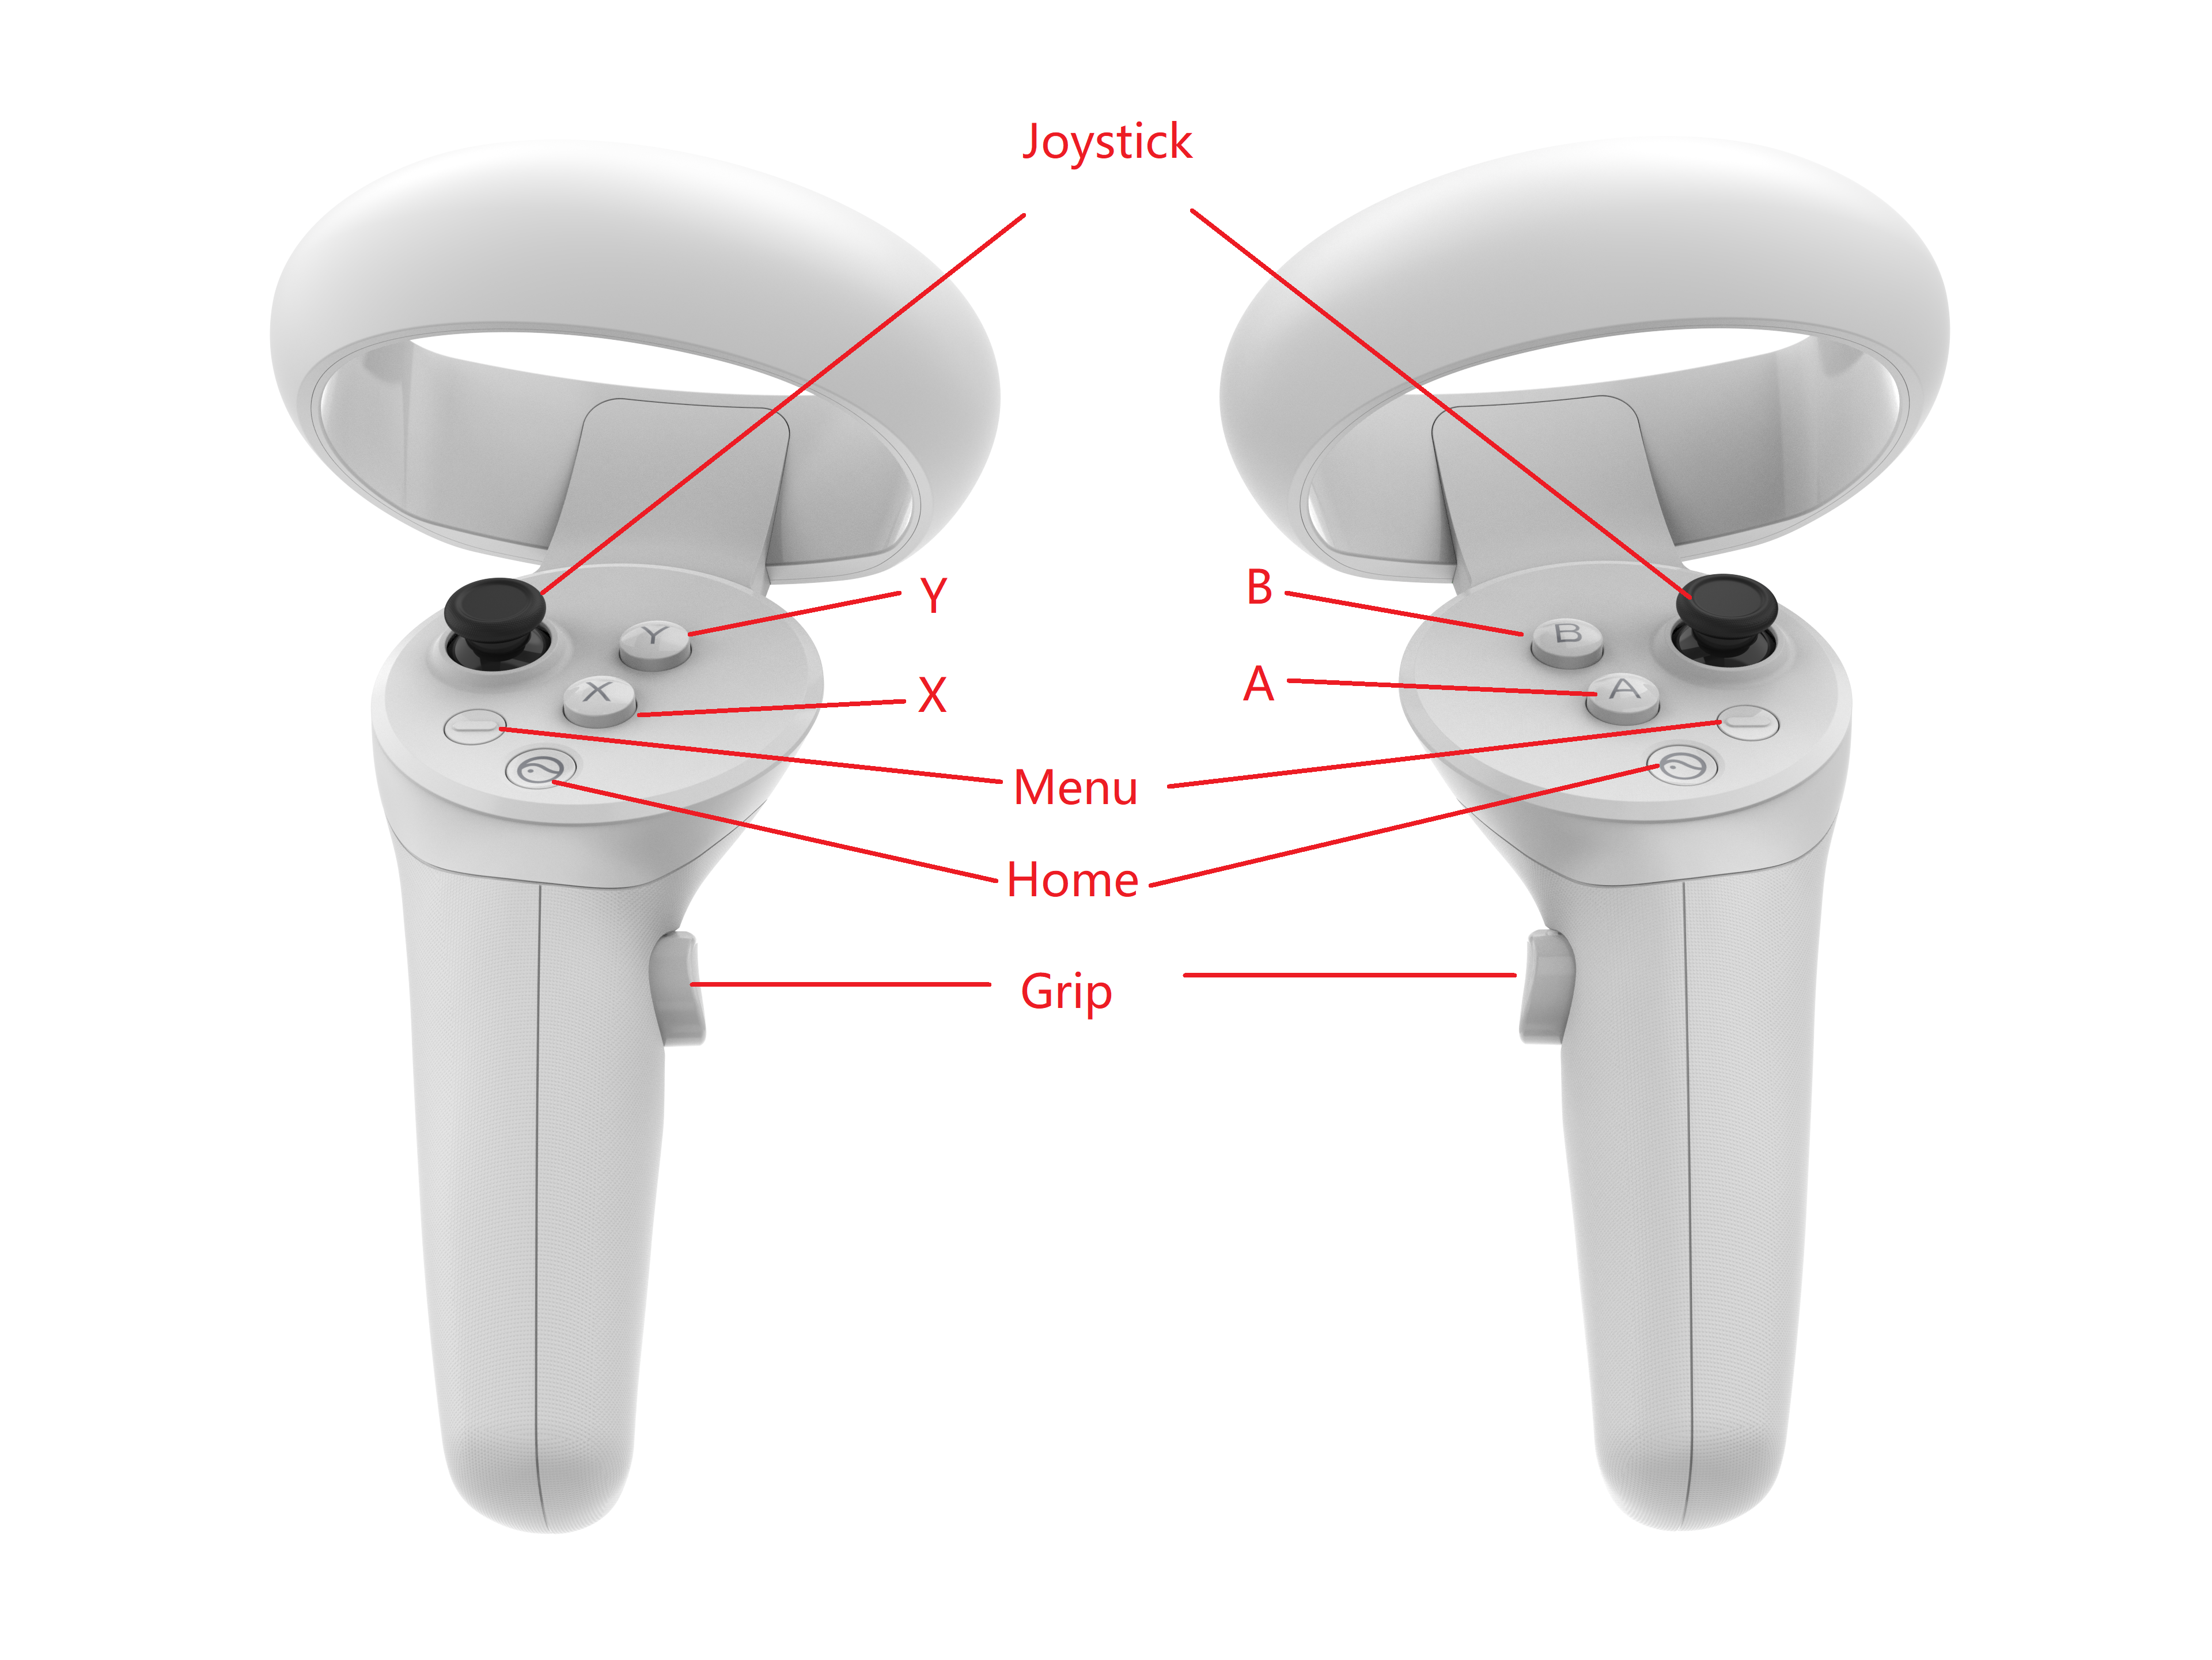
Fig 5.5 Key mapping diagram (front view)
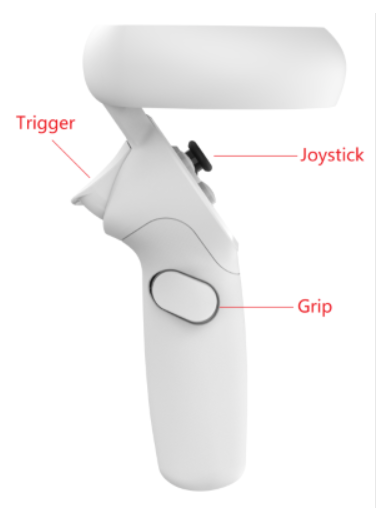
Fig 5.6 Key mapping diagram (side view)
| Key | Input Event |
|---|---|
| Home | ButtonNum.home |
| App | ButtonNum.app |
| Click | ButtonNum.click |
| Trigger | CVController.getTriggerNum() |
| RightGrip | ButtonNum.buttonRG(only in left controller) |
| LeftGrip | ButtonNum.buttonLG(only in right controller) |
| Left controller:X Right controller:A | ButtonNum.buttonAX |
| Left controller:Y Right controller:B | ButtonNum.buttonBY |