4 Detailed Steps for Updating the Example Player
Follow the steps below to replace the Oculus SDK in the example player with the Pico SDK:
- Delete the Oculus SDK prefab from the scene:

Figure 9 – Location of the Oculus SDK prefab.
- Import the Pico SDK Unity package:
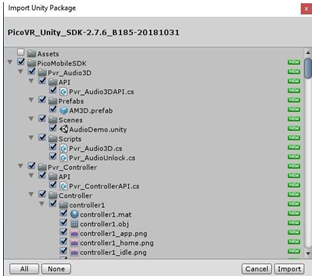
Figure 10 – Importing the Pico SDK Unity package.
- Drag PicoMobileSDK > Pvr_UnitySDK > Prefabs > Pvr_UnitySDK into the scene and set the position:
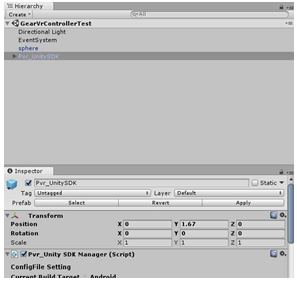
Figure 11 – Adding the prefab to the scene.
- Add PvrController0 and PvrController1 to Pvr_UnitySDK as child nodes of Pvr_UnitySDK, and add ControllerManager into scene:
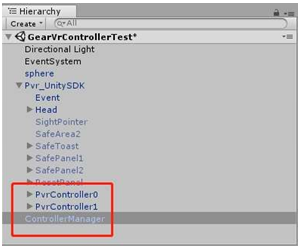
Figure 12 – Adding the controllers and controller manager to the scene.
- Update the controller settings:
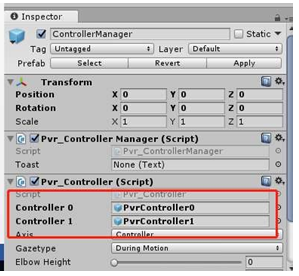
Figure 13 – Updating the controller settings.
- Set Head Pose and Hand Pose of Pvr_UnitySDK Manager to Three Dof:
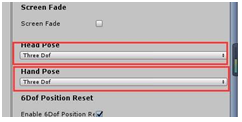
Figure 14 – Setting the head and hand poses.
- Set Rendering > Graphics APIs to OpenGLES2 as the only graphics API, disable Multithreaded Rendering, and disable Virtual Reality Supported under XR settings:
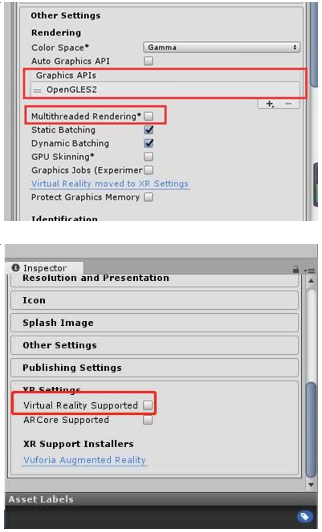
Figure 15 – Configuring rendering and XR settings.
- Build and install the application. Figure 16 shows the application running:
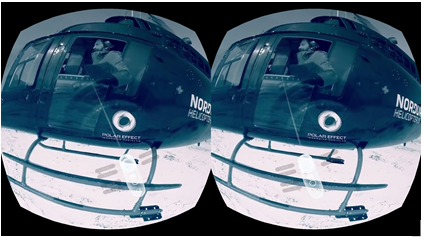
Figure 16 - View of the application running on the headset.