5 Hardware product development guide
This chapter will introduce the use methods of using the SDK on various Pico hardware products. developers should only follow steps relevant to the intended product.
5.1 Instruction of Pico hardware
5.1.1 Realize head tracking and stereo rendering
To Rrealize the consistency of head tracking, just add the Prefabs file in the Pvr_UnitySDK folder to the scene as mentioned in Quick Start of SDK.
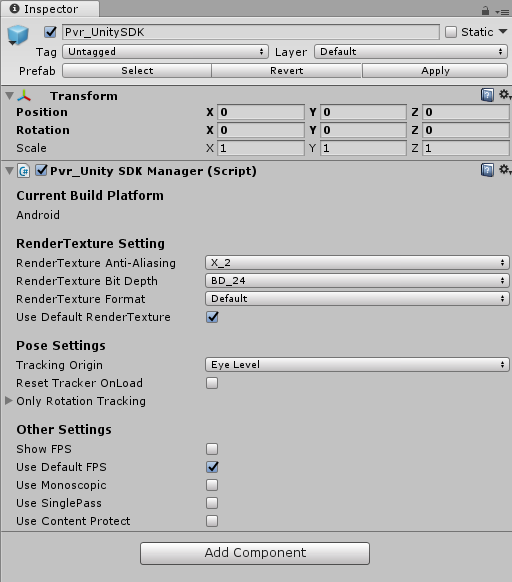
Figure 5.1 Switch tracking options
Functions provided by Pvr_UnitySDK:
Use Default Render Texture: Whether to use default render texture. For more details, please refer to Chapter 8.4.
Tracking Origin: Set up current tracking method. For more details, please refer to Chapter 8.11.
Reset Tracker Onload: Whether apply re-centering when entering scene.
Only HMD/Controller Rotation Tracking:
- ”Only HMD Rotation Tracking”: when unchecked means that the head tracking is 6 degrees of freedom, with posture and position; when checked means that the head tracking is 3 degrees of freedom tracking, only posture, no position;
- “Only Controller Rotation Tracking”: when unchecked indicates that the tracking of the hand is 6 degrees of freedom, with posture and position; when checked means that the tracking of the hand is 3 degrees of freedom, only the posture, no position.
Show Fps:Whether to show current Fps.
Use Default Fps:Whether to use default Fps.
Use Monoscopic:Enable Monoscopic.
Use Singlepass:Enable Singlepass.
Use Content Protect: Application copyright protection option. Screenshots, Screenrecords and Screencasting are prohibited when selecting this option.
5.1.2 Instructions for Use With Controllers
1.From Assets> PicoMobileSDK> Pvr_Controller> Prefabs,drag ControllerManager into your scene as a child of Pvr_UnitySDK. Set position(0,0,0)for ControllerManager.
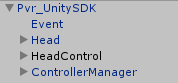
Figure 5.2 Set ControllerManager
The use of controller keys needs to be in the form of calling interface API. For specific API, please refer to Chapter 7 API Interface Function List.
Note: If SDK versions previous to v.2.8.0 was once used, delete the PvrController0 and PvrController1 prefabs, and only use the ControllerManager prefab.
2.Use customized controller model
To use customized controller model (e.g. pistol, slingshot, wand, sword etc.), please check this option.
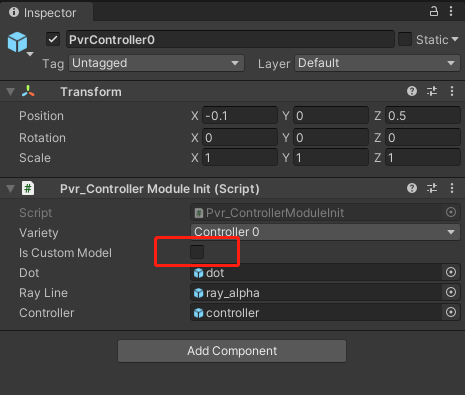
Figure 5.3 Custom controller model option
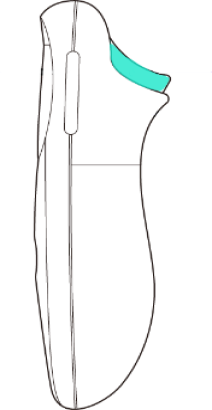
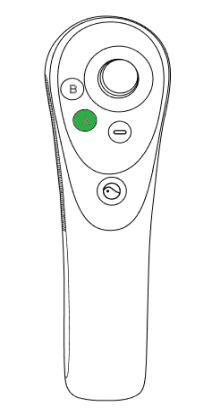
3.Adjusting controller model angle
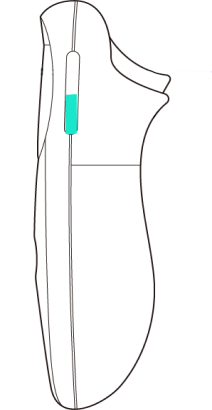
Pico Neo 3 uses a different design from Neo 2 that Neo 3 controller bends 34 degree comparing to horizontal plane when user holds it. See figure below for details.
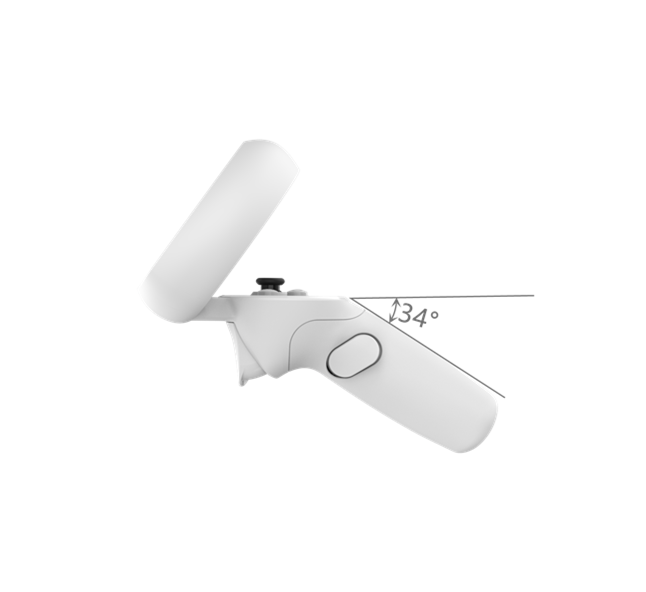
Figure 5.4 Pico controller angle diagram
Latest Pico SDK adds adjustment to the angle of controller model to allow application designed for Neo 3 can work well on Neo 2. To use latest SDK on Neo 2, it’s suggested to adjust the controller angle and raise the “controller” prefabs of PvrController0 and PvrController1 34 degrees on x-axis.
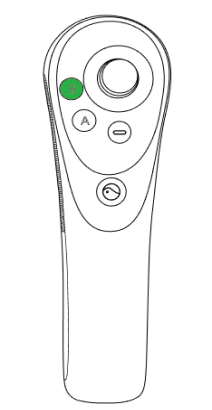
5.2 Pico G2/G2 4K Input instructions
When using the key and touchpad of the single handle, you need to call the interfaces related to the handle. Please refer to Chapter7.3 for specific interfaces. Here, the corresponding relationship between the parameters of the following interfaces and the physical handle keys is introduced.
Correspondence between physical keys of G2 /G2 4K controllers and parameters in API interface functions is as follows.
| G2 controller key | Input binding |
|---|---|
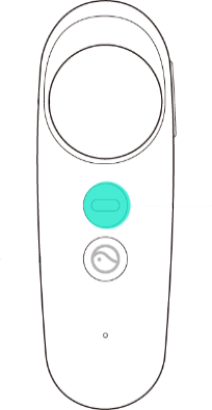
|
Pvr_KeyCode.APP |
|
Pvr_KeyCode.Home |
|
Pvr_KeyCode.TOUCHPAD |
|
Pvr_KeyCode.TRIGGER |

|
Pvr_KeyCode.VOLUMEUP |
|
Pvr_KeyCode.VOLUMEDOWN |
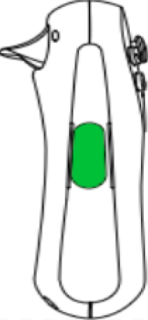
The schematic diagram of the touchpad is as follows:
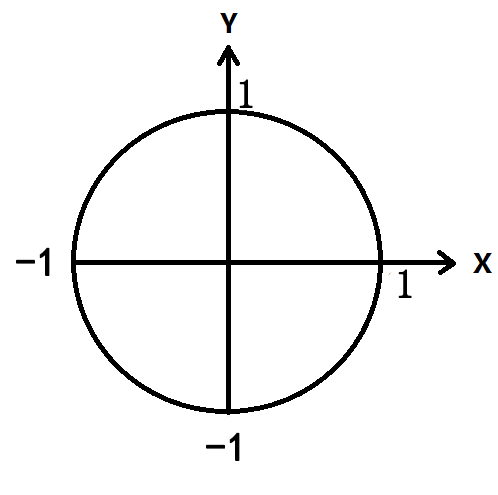
Figure 5.5 Schematic diagram of touchpad
Notes: The above diagram is for the new touchpad with sdk versions later than v.2.8.6. For versions before v.2.8.6, the direction and range of X and Y are different.
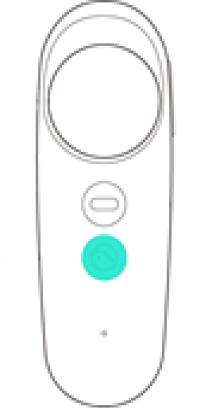
5.3 Pico Neo 2 Input instructions
When using the keys and joysticks of two controllers, you need to call the interface API. See Chapter 7.3 for details. Here, only the corresponding relationship between the parameters of the interface API and the physical controller keys is introduced:
Pico Neo 2:
| Keys | Input event | ||||
|---|---|---|---|---|---|

|
Pvr_KeyCode.HOME | ||||
|
Pvr_KeyCode.APP | ||||
|
Pvr_KeyCode.TRIGGER | ||||
|
|
||||
|
Pvr_KeyCode.X (Controller 0) | ||||
|
Pvr_KeyCode.Y (Controller 0) | ||||
|
Pvr_KeyCode.A (Controller 1) | ||||
|
Pvr_KeyCode.B (Controller 1) | ||||
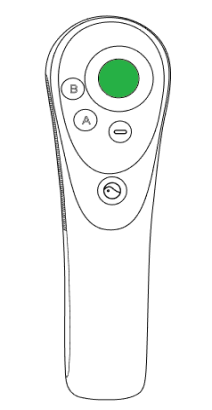
|
Pvr_KeyCode.TOUCHPAD | ||||
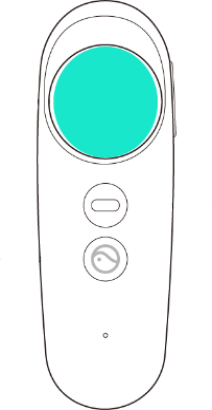
5.4 Pico Neo3 Input instructions
When using the keys and joysticks of two controllers, you need to call the interface API. See Chapter 7.3 for details. Here, only the corresponding relationship between the parameters of the interface API and the physical controller keys is introduced:
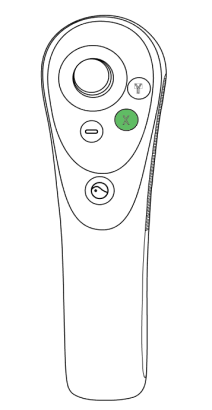
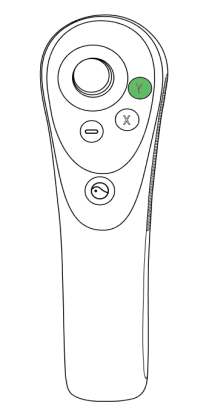
Pico Neo 3:
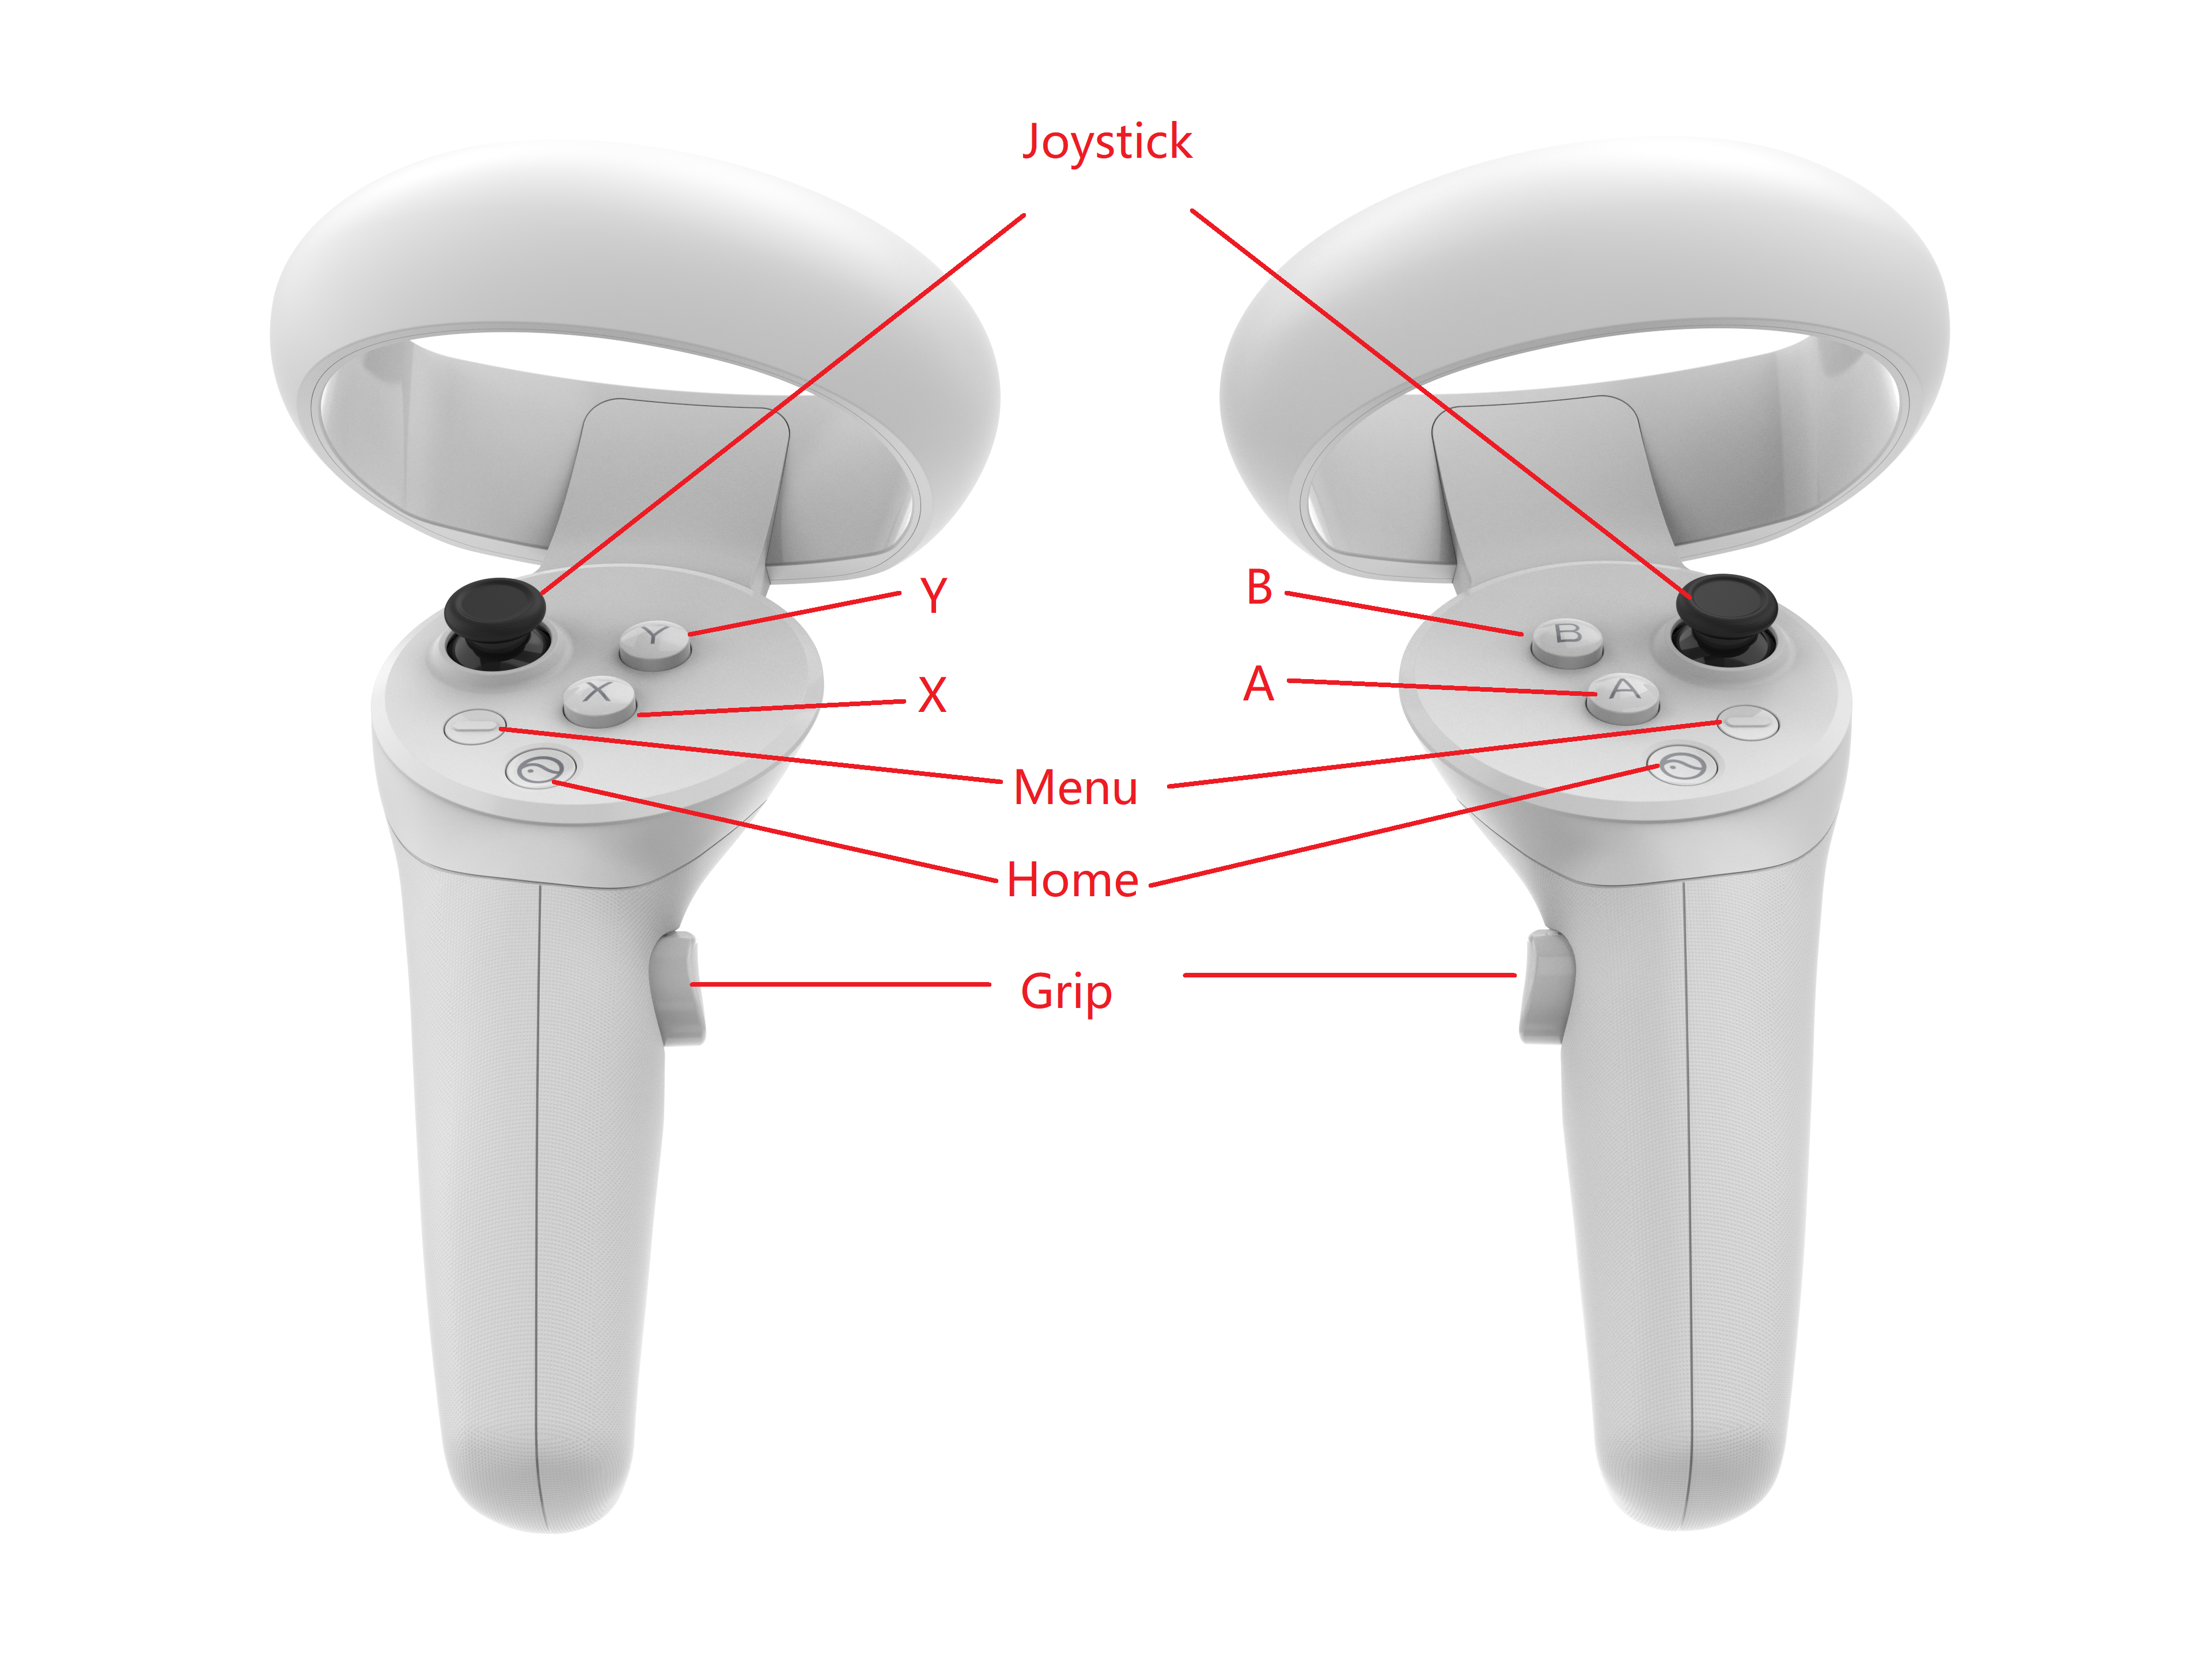
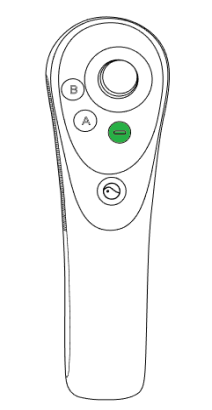
Figure 5.6 Key mapping diagram (front view)
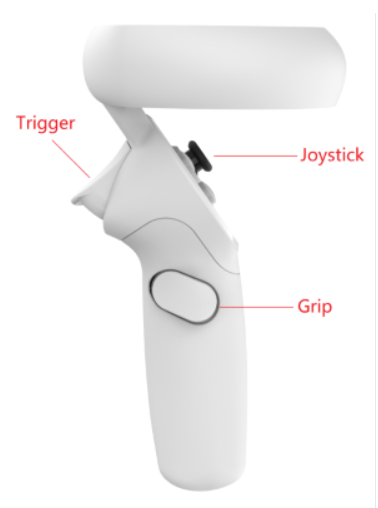
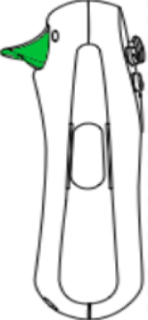
Figure 5.7 Key mapping diagram (side view)
| Keys | Input event |
|---|---|
| Home | Pvr_KeyCode.HOME |
| Menu | Pvr_KeyCode.APP |
| Trigger | Pvr_KeyCode.TRIGGER |
| Grip | Pvr_KeyCode.Right (Controller 1 is the right controller) Pvr_KeyCode.Left (Controller 0 is the left controller) |
| Joystick | Pvr_KeyCode.TOUCHPAD |
| X | Pvr_KeyCode.X(Controller 0) |
| Y | Pvr_KeyCode.Y(Controller 0) |
| A | Pvr_KeyCode.A(Controller 1) |
| B | Pvr_KeyCode.B(Controller 1) |
5.5 Pico HMD key
The following table refers to the correspondence between the keys on the head mounted display and the key values in Unity.
| HMD Key | Input Key of Unity |
|---|---|
| Return Key | KeyCode.Escape |
| OK Key | KeyCode.JoystickButton0 |
| HOME Key | KeyCode.Home (system occupied, not open by default) |
| Volume Up Key | Android standard VOLUME_UP (system occupied, not open by default) |
| Volume Down Key | Android standard VOLUME_DOWN (system occupied, not open by default) |
Note:Using Keycode. JoystickButton0 is not applicable when using the new Input system. If you still want to use the old input manager to get the headset confirm key value, You will need to check “Both” or “Input Manager(Old)” in Player Settings-> Player-> Other Settings->Active Input Handling* option.

Figure 5.8 Switch between old and new input systems