1 Pico Spatial Audio Renderer
This is the integration and usage manual for Pico Spatial Audio Renderer Unity plugin, please follow all the steps carefully.
Supported Unity Versions
We have tested the renderer in following versions
- 2020.3LTS
- 2021.1LTS、2021.2LTS
Pico Spatial Audio Unity plugin content list
- Plugins: Stores dynamic library of our spatial audio renderer engine for all platforms. You can delete unused dynamic library files depend on the platform you develop on and deploy to.
- Prefabs:Utility prefabs.
- Samples:Stores example scenes to demonstrate how to develop a scene using Pico Spatial Audio Renderer. You can also quickly try out various features of our renderer.
- Runtime:Stores C# code for the engine Unity wrapper and utilities components. These are the files you would need to use when developing your experience with our renderer:
- PXR_Audio_Spatializer_Context.cs
- PXR_Audio_Spatializer_AudioSource.cs
- PXR_Audio_Spatializer_AmbisonicSource.cs
- PXR_Audio_Spatializer_AudioListener.cs
- Some utility scripts should also exist:
- PXR_Audio_Spatializer_API.cs
- PXR_Audio_Spatializer_Types.cs
- If you need to use environmental acoustic simulation, please make sure that the following scripts exist:
- PXR_Audio_Spatializer_SceneGeometry.cs
- PXR_Audio_Spatializer_SceneMaterial.cs
OK! Now you should have everything you need to get started. In the following sections, we will walk you through the process of integrating Pico Spatial Audio Render into your Unity experience. We will start with a basic free field scene, then move on to integrating environmental acoustics simulation, and finally onto rendering ambisonic audio content.
Integrating Pico Spatial Audio Renderer (free field)
The word “free field” means that we only simulate position of sound sources, ignoring all environmental acoustics phenomenons. Under free field use case, we only needs the following 3 scripts:
- PXR_Audio_Spatializer_Context.cs
- PXR_Audio_Spatializer_AudioSource.cs
- PXR_Audio_Spatializer_AudioListener.cs
Here is the integration walk through:
- Suppose we have an empty Unity 3D project opened
- Install Pico Spatial Audio Renderer plugin to your project
- Decompress PicoSpatialAudio.zip
- Install the renderer using either of the following 3 methods
i . Copy the PicoSpatialAudio folder to your Unity project folder, under the Assets folder
ii . Copy the PicoSpatialAudio folder to your Unity project folder, under the Packages folder
iii . Add the Package in Unity Package Manager
- Press the “+” button on top left corner of the UPM window, then press “Add packages from disk”

- Find the package.json under the PicoSpatialAudio folder you decompressed, then double click it to import.
- For Developers using Unity on Mac:
i . Because of the Gatekeeper mechanism on Mac, you may encounter warnings like the following ones when installing Pico Spatial Audio Renderer to your project the first time:
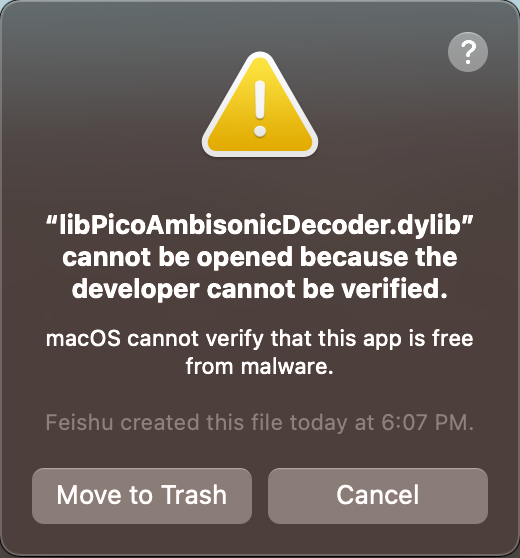
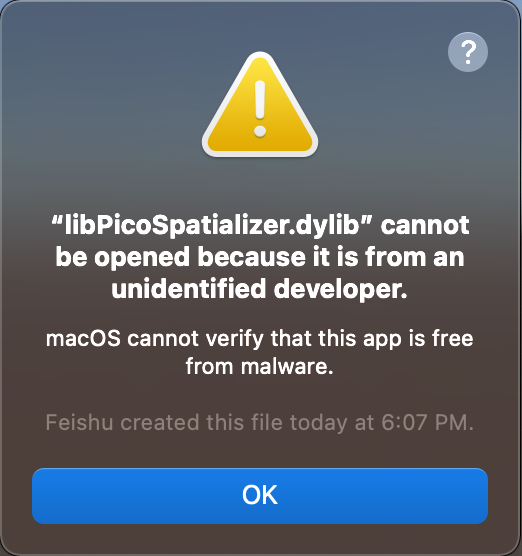
This is because Mac OS stopped loading of our spatial audio renderer dynamic library by accident; For now, when seeing warnings like this, please work around the issue using following steps:
- Open up System Preferences, go to “Security & Privacy”
- On the bottom of Security & Privacy, Mac OS mentioned that “libPicoSpatializer.dylib” or “libPicoAmbisonicDecoder.dylib” has been stopped from using. Please press the “open anyway” button on the right.

- If some of the initial warning window still exist, Press “OK” on those windows.
- Please restart your Unity project. If there’s no warning anymore from Unity or Mac OS, The Pico Spatial Audio Renderer is successfully installed in your Unity project.
- Create an empty game object in the scene
- Attach PXR_Audio_Spatializer_Context.cs component to this game object.
- You can setup spatial audio rendering quality on PXR_Audio_Spatializer_Context.cs component, in order to achieve desirable balance between quality and performance.

- Create another game object in the scene. In order to see it clearly visually, we created a sphere here.
- Attach PXR_Audio_Spatializer_AudioSource.cs component on this game object. A Unity audio source component will be automatically attached.
- We suggest you keeping the “spatial blend” of Unity AudioSource at 0; A non-zero spatial blend value would cause some of the Unity spatialization effect work concurrently with Pico Spatial Audio Renderer, which would exaggerate distance attenuation and doppler effect.

- Find the game object that has audio listener component attached to (usually be the one that has the main camera component attached), attach PXR_Audio_Spatializer_AudioListener.cs component to it.

That’s it! Now you’ve successfully integrated Pico Spatial Audio Renderer into your Unity project, and implemented a basic sound spatialization scene.
Now, let’s use the scene you just setup to spatialize an actual audio signal.
- Select an audio file you want to spatialize, import it into your Unity project.
- On you sound source object, you can see an Audio Source component. In the AudioClip field of the Audio Source, fill-in the audio file you just imported.
- To make the Audio Source play as soon as we hit Play, tick the “Play On Awake” and “Loop” options on the Audio Source Component.

- Hit Play, you should be able to hear your audio file being spatialized in realtime.
Integrating Pico Spatial Audio Renderer (with environmental acoustic)
Realtime environmental acoustic simulation is a core feature of Pico Spatial Audio Renderer, which can simulate sound reflections, occlusion, and many more acoustic phenomenons in Realtime. In this chapter, we will build upon the free field scene we setup last chapter , and walk you through the process of adding environmental acoustic simulation to your experience.
- Build / import a virtual environment model in your scene
- If you imported scene geometry mesh from outside Unity, please make sure “Read/Write Enabled” option is ticked:

- On your environment model objects, attach PXR_Audio_Spatializer_SceneGeometry.cs components. A PXR_Audio_Spatializer_SceneMaterial.cs component will be attached automatically.
- In all PXR_Audio_Spatializer_SceneGeometry.cs components
- Include Children:Used to setup whether this acoustic geometry includes its children object.
- Ignore Static:Used to setup if this acoustic geometry ignores static mesh
- Visualize Mesh In Editor:Visualize the game object mesh associated with this acoustic geometry with white wire frame. This only works in editor, and won’t affect play mode or build.
- In all PXR_Audio_Spatializer_SceneMaterial.cs components
- Absorption,Element 0 ~ 3:Defines the amount of sound energy absorbed by this acoustic material. Element0 to Element3 represent absorption coefficient on 4 frequency bands, from low to high.
- Scattering:Defines the amount of sound energy scattered by this acoustic material. In an environment with high scattering, the reflection sound you hear would be more like reverb; while in an environment with low scattering, the reflection sound you hear would be more like distinctive echos.
- Transmission: 3. Transmission: Defines the amount of sound energy that could be transmitted through this acoustic material.
- You can design those acoustic parameters the way you see fit. You can also choose form various material presets we provides, and start from there.

Integrating Pico Spatial Audio Renderer (Rendering Ambisonic Audio Signal)
The Pico Spatial Audio Renderer can auralize first order ambisonics signal with AmbiX format convention. We will walk you through the process of
- Open up project settings -> Audio in your Unity project
- At the Ambisonic Decoder Plugin option, select “Pico Ambisonic Decoder”

- Create an ambisonic rendering bus
- You can just use the “Ambisonic_bus” in plugin example and skip this step; but if you want to create your own, feel free to continue.
- Create an Audio Mixer in you Unity project. For easier description, we assume the mixer is called “My_Fancy_Ambisonic_bus”.

- Click on My_Fancy_Ambisonic_bus -> Master, you can see channel setup in the inspector on the right.
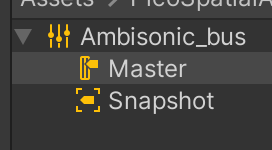
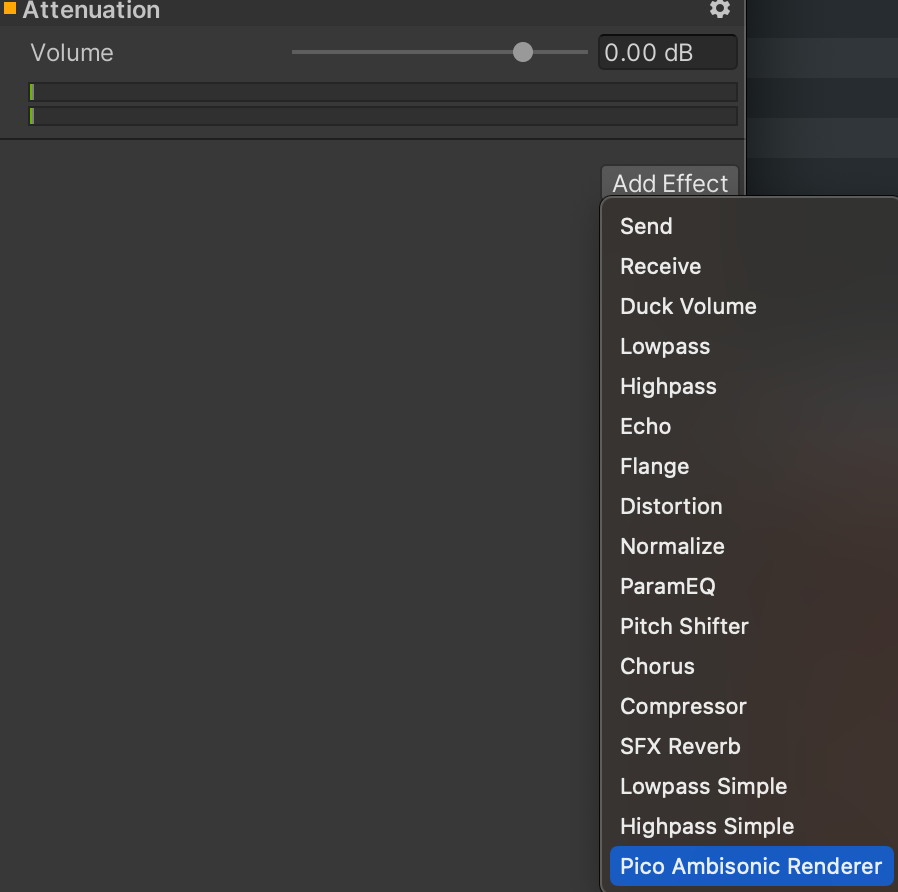
- Click on “Add Effect”, add a “Pico Ambisonic Renderer”
- Create an empty game object in a scene, and attach PXR_Audio_Spatializer_AmbisonicSource component to it; a Unity AudioSource will be attached automatically.
- Setup the output of AudioSource to Master (My_Fancy_Ambisonic_bus)
That’s it! You’ve setup ambisonic audio playback; Now let’s have a listen.
- Find loop_FOA_48k Audio Clip in PicoSpatialAudio -> Sample -> audio folder
- Drag loop_FOA_48k to the AudioClip field of AudioSource
- If you want to use other AudioClip, please make sure that
i . It’s a first order ambisonics clip in AmbiX format
ii . The “Ambisonic” option of this AudioClip is ticked
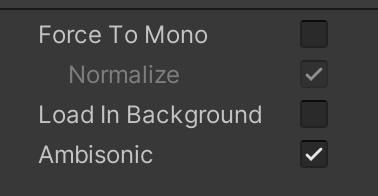
- Select “Play On Awake” and “Loop” option on AudioSource

- Hit Play. If you are using loop_FOA_48k as your AudioClip, you should be hearing a music piece placed in front of listener, then moving in the following trajectory:
- Move horizontally around the listener for one cycle, clock-wise;
- Move vertically around the listener for one cycle; the sound source moves upwards first, then moves downwards.
Integrating Pico Spatial Audio Renderer (Utility Functions))
We provided some utility function for various components in our renderer, so you can have better control over your virtual acoustic scene. All utility functions can be called realtime.
PXR_Audio_Spatializer_AudioSource
- public void Resume()
- Resume playing this sound source from last playhead position
- public void SetGainDB(float gainDB)
- Setup the gain of this source, in unit of dB
- public void SetSize(float radius)
- Setup the volumetric radius of this source, in unit of meters
- public void Resume()
PXR_Audio_Spatializer_AmbisonicSource
- public void Resume()
- Resume playing this sound source from last playhead position
- public void Resume()
PXR_Audio_Spatializer_Context
- public void SetRenderingQuality(PXR_Audio.Spatializer.RenderingMode quality)
- Setup Engine rendering quality, which will affect room acoustic simulation speed and quality, angular precision of direct sound and reflections
- public void SetRenderingQuality(PXR_Audio.Spatializer.RenderingMode quality)
Supplementary 1: Development know-hows
Max num of sound sources
- Currently, the audio rendering of simulated environmental acoustics has lots of load on CPU. When using environmental acoustic simulation, please make sure that there is less than 20 sources playing concurrently. We will keep optimizing audio rendering speed, so you can render more sound sources concurrently with future render versions.
Know limitations and workarounds
When having a complex scene geometry, attaching PXR_Audio_Spatializer_SceneGeometry component directly to it might cause:
- If a listener and source pair is separated by complex scene geometry, but exist a high order reflection path between them, you might still not able to hear reflection sounds;
- If a listener and source pair is separated by complex scene geometry, with listener being out door and source being indoor, you might end up hearing reflection sound that should have been blocked by scene geometry
You can work around this corner case by one or multiple of following methods:
Manually add some Pico Sound Reflection Object to places where you want your sound to be reflected.
- You can find Pico Sound Reflection Object at Pico Spatial Audio -> Prefabs folder
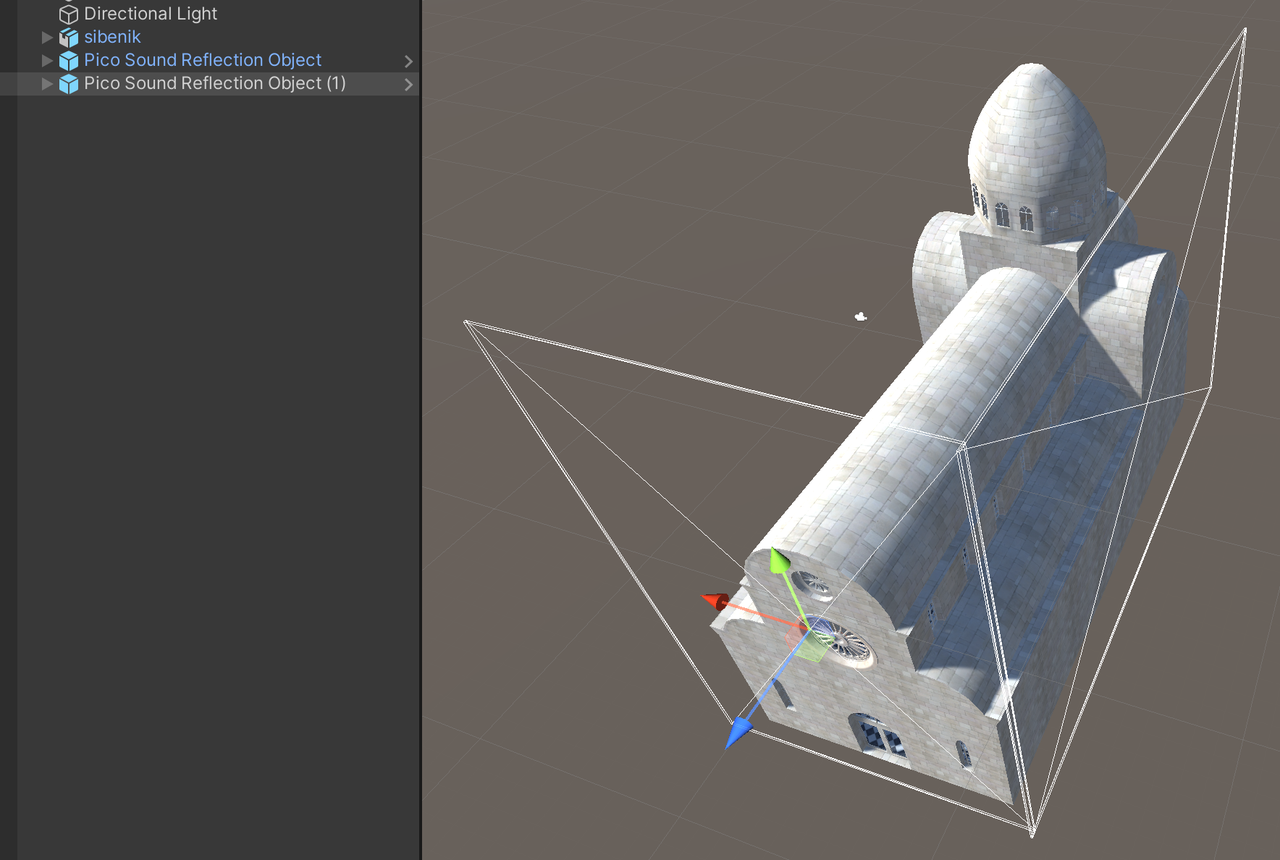
- Separate scene mesh into multiple game objects, and only attach PXR_Audio_Spatializer_SceneGeometry component to large walls instead of every small objects with detailed geometries
- Avoid this issue by gameplay design; Simply don’t let player enter erroneous regions.
- We will keep research and optimize on environmental acoustics simulation, so that you, as a game developer, would not to worry about this issue anymore with future releases.
Supplementary 2: Other know issues
- On Mac OS, If you run any example scenes in PicoSpatialAudio/Sample within Unity Editor, and press any keyboard key, you might hear some beeping mac warning sound. This is cause by a know Unity bug, we can only hope that Unity would fix this problem soon. You can discuss about this issue here: https://issuetracker.unity3d.com/issues/macos-funk-error-sound-plays-when-pressing-any-non-shortcut-key-in-play-mode